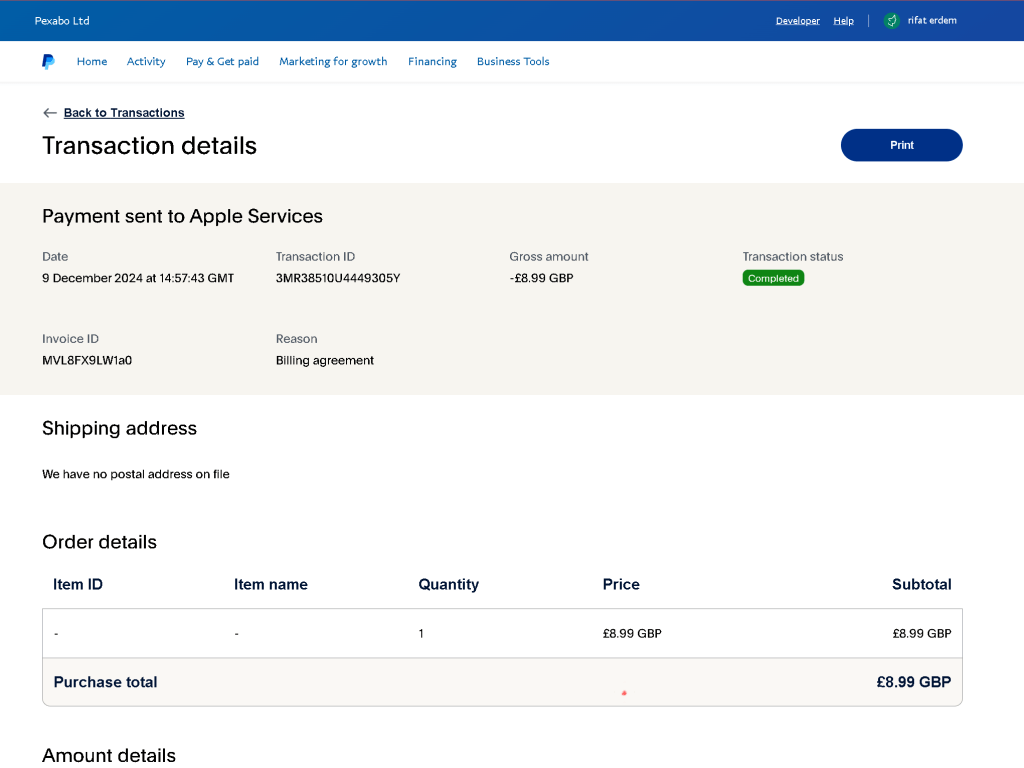
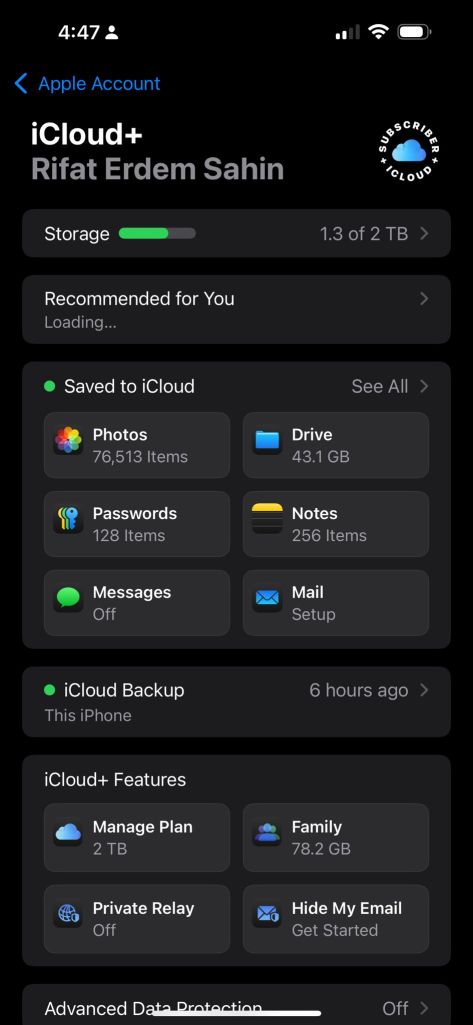
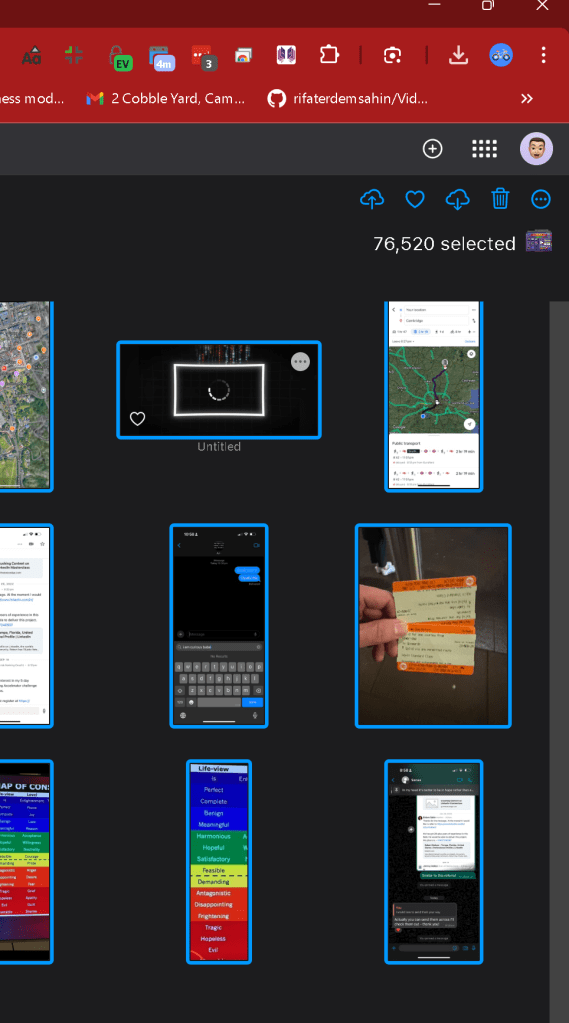
Apple Costs Storage and Mitigation
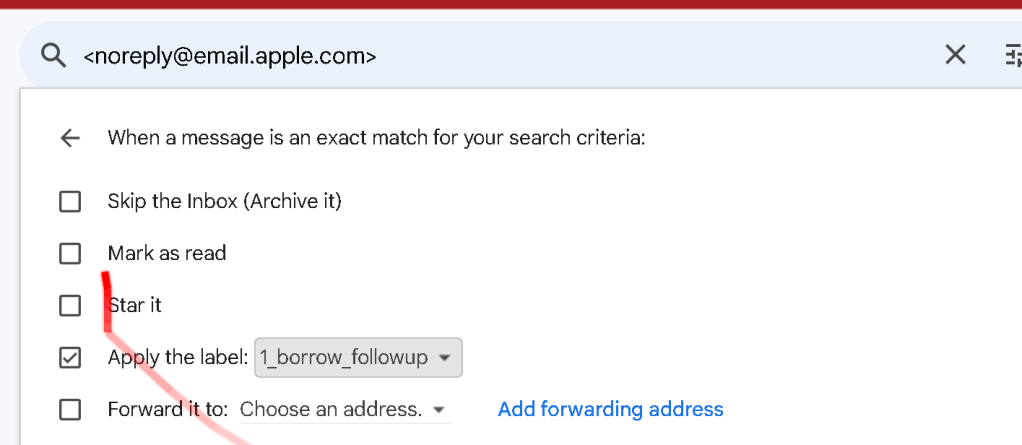
https://mail.google.com/mail/u/0/#advanced-search/is_unread=true&query=label%3A1_borrow_followup&isrefinement=true/FMfcgzQXKWpRhdhjsZkBhfdMWWWDrSWM
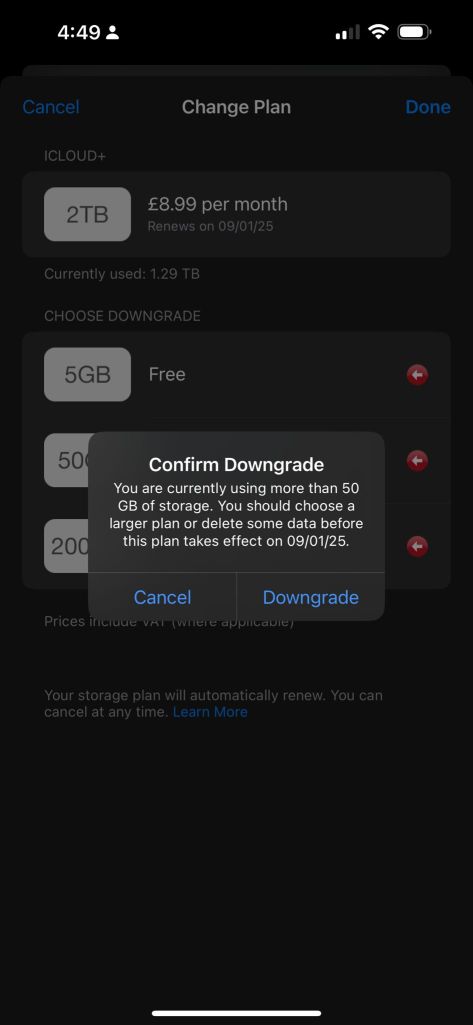
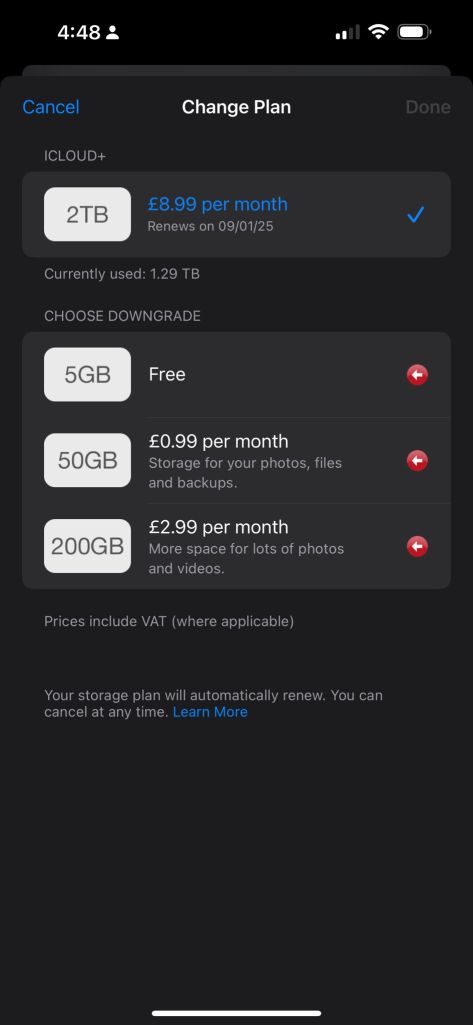
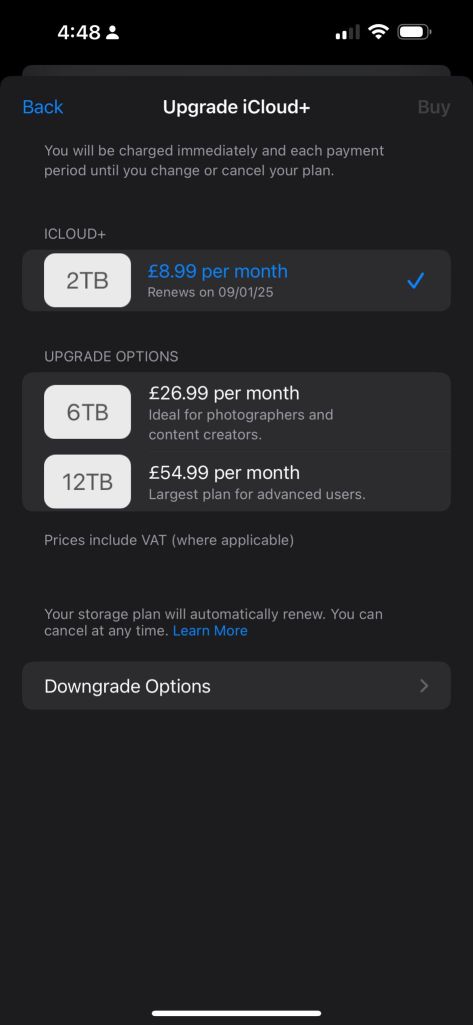
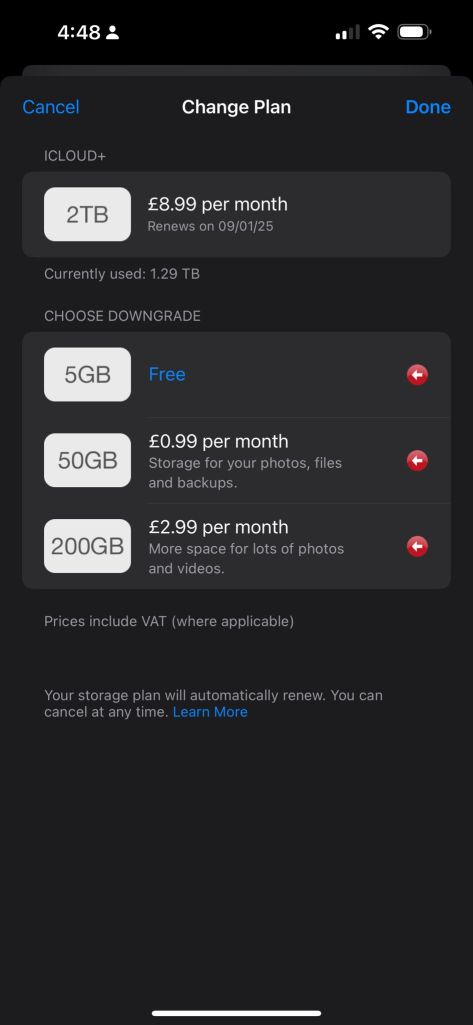
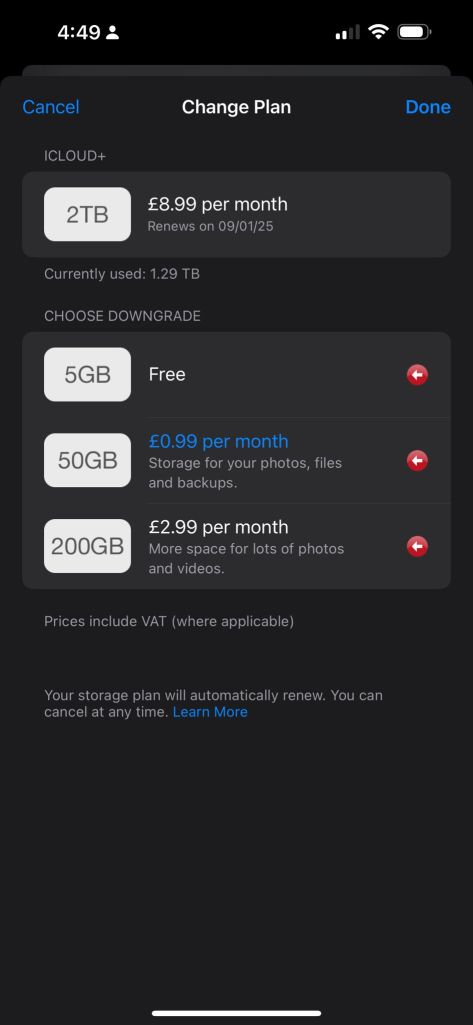
Downgrade Options
Saving files from Apple Photos to a Synology NAS can be a smart way to manage costs and ensure you have a reliable backup. Here's a step-by-step guide to make the process straightforward:
1. Set Up Synology NAS
Ensure your Synology NAS is set up and accessible from your Mac:
- Install Synology Drive or enable SMB/AFP:
Open the Synology DiskStation Manager (DSM).
-
Go to Control Panel > File Services and enable SMB for network sharing.
-
Note the NAS’s local network address and create a user account if needed.
-
Map the NAS to your Mac:
On macOS, open Finder and press Command + K.
-
Enter the NAS address (e.g.,
smb://192.168.1.x) and connect with your credentials. -
You’ll see the NAS as a folder in Finder.
2. Export Photos from Apple Photos
You have two options for exporting: individual photos or the entire library.
Export Individual Photos
-
Open Apple Photos and select the images you want to move.
-
Click File > Export > Export [x] Photos.
-
Choose the format and quality (JPEG/PNG, etc.).
-
Set the destination folder directly to your Synology NAS.
Export the Entire Library
- Locate the Photos Library:
By default, it’s in ~/Pictures/Photos Library.photoslibrary.
- Copy the library to the NAS:
Drag the Photos Library.photoslibrary file to your mapped NAS drive in Finder.
⚠️ Warning: Copying the entire library means you won't have access to the library structure without Apple Photos unless you export individual files.
3. Automate Transfers with Synology Drive or Backup Tools
- Use Synology Drive Client:
Install the Synology Drive Client on your Mac.
-
Set up a sync task for the Apple Photos folder or library to ensure automatic backups.
-
Time Machine Backup:
You can also use Time Machine to back up your Mac, including Apple Photos, directly to the NAS.
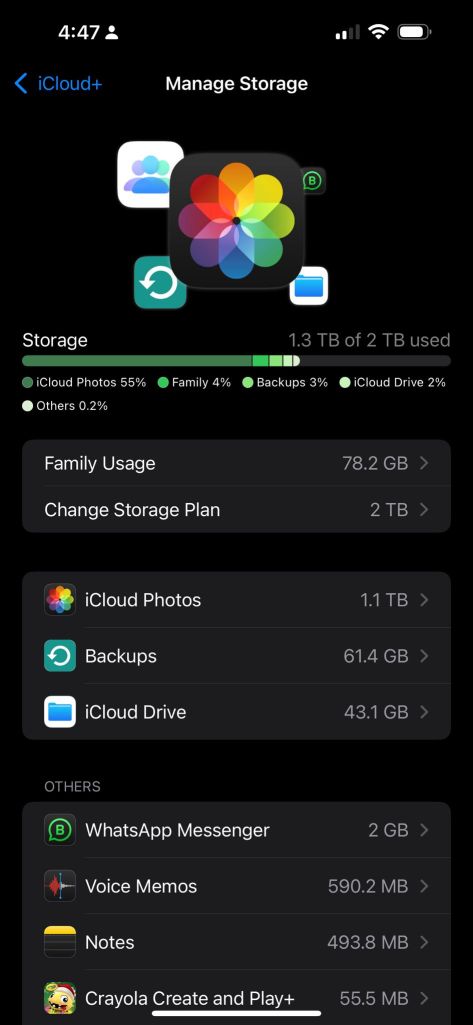
4. Optimize Apple Storage Costs
Once your files are safely stored on the NAS:
- Free Up Space in iCloud:
Go to Apple Photos > Preferences > iCloud and select Optimize Mac Storage or turn off iCloud Photos entirely if you don’t need it.
- Delete Local Copies:
Confirm the NAS backup, then delete photos from Apple Photos.
This process keeps your photos safe on your NAS while reducing reliance on paid iCloud storage.
Limitations
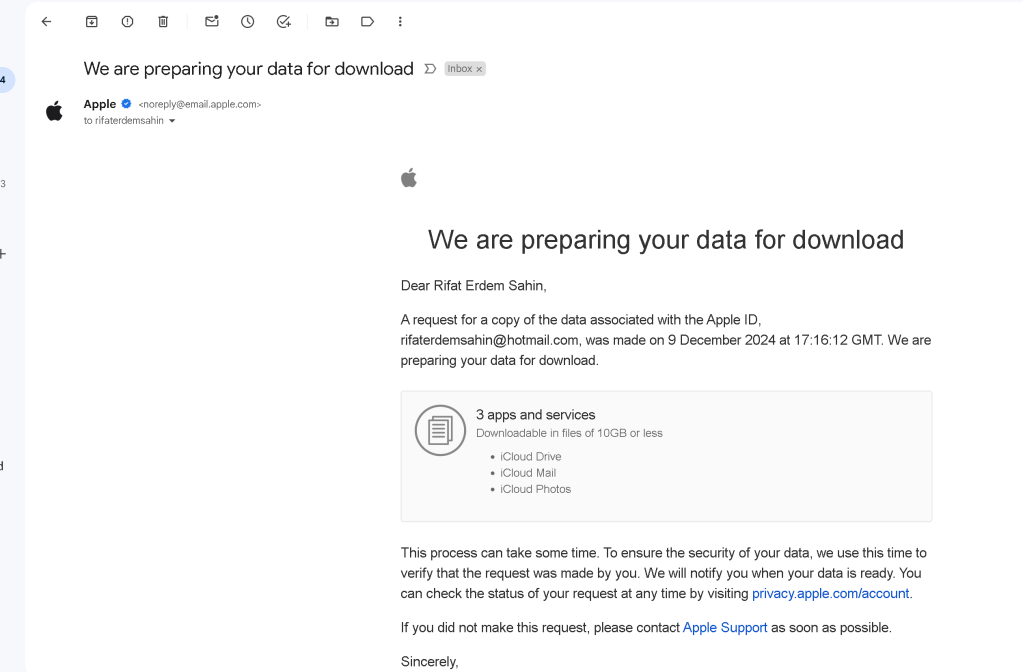
Take out and get an email
Saving files from Apple Photos to a Synology NAS can be a smart way to manage costs and ensure you have a reliable backup. Here's a step-by-step guide to make the process straightforward:
1. Set Up Synology NAS
Ensure your Synology NAS is set up and accessible from your Mac:
- Install Synology Drive or enable SMB/AFP:
Open the Synology DiskStation Manager (DSM).
-
Go to Control Panel > File Services and enable SMB for network sharing.
-
Note the NAS’s local network address and create a user account if needed.
-
Map the NAS to your Mac:
On macOS, open Finder and press Command + K.
-
Enter the NAS address (e.g.,
smb://192.168.1.x) and connect with your credentials. -
You’ll see the NAS as a folder in Finder.
2. Export Photos from Apple Photos
You have two options for exporting: individual photos or the entire library.
Export Individual Photos
-
Open Apple Photos and select the images you want to move.
-
Click File > Export > Export [x] Photos.
-
Choose the format and quality (JPEG/PNG, etc.).
-
Set the destination folder directly to your Synology NAS.
Export the Entire Library
- Locate the Photos Library:
By default, it’s in ~/Pictures/Photos Library.photoslibrary.
- Copy the library to the NAS:
Drag the Photos Library.photoslibrary file to your mapped NAS drive in Finder.
⚠️ Warning: Copying the entire library means you won't have access to the library structure without Apple Photos unless you export individual files.
3. Automate Transfers with Synology Drive or Backup Tools
- Use Synology Drive Client:
Install the Synology Drive Client on your Mac.
-
Set up a sync task for the Apple Photos folder or library to ensure automatic backups.
-
Time Machine Backup:
You can also use Time Machine to back up your Mac, including Apple Photos, directly to the NAS.
4. Optimize Apple Storage Costs
Once your files are safely stored on the NAS:
- Free Up Space in iCloud:
Go to Apple Photos > Preferences > iCloud and select Optimize Mac Storage or turn off iCloud Photos entirely if you don’t need it.
- Delete Local Copies:
Confirm the NAS backup, then delete photos from Apple Photos.
This process keeps your photos safe on your NAS while reducing reliance on paid iCloud storage.
Mark it for future
Imported from rifaterdemsahin.com · 2025