🚀 How to Set Up Rancher on GitHub CodeSpaces: A Step-by-Step Guide
If you're exploring ways to efficiently manage Kubernetes clusters, Rancher is a powerful solution. But setting it up can sometimes be a bit tricky. In this guide, we'll walk through the process of setting up Rancher within GitHub CodeSpaces, enabling you to spin up and manage Kubernetes clusters seamlessly!
💡 What You'll Need:
-
A GitHub Account with CodeSpaces enabled.
-
Basic knowledge of Kubernetes and Docker.
-
A Rancher image (We’ll pull the latest one).
🛠️ Step 1: Create a New GitHub Repository
-
Go to your GitHub Dashboard.
-
Click on New Repository and name it something relevant like
rancher-on-codespaces. -
Choose the repository settings as per your preference and initialize it with a README file.
🚀 Step 2: Open Your Repo in CodeSpaces
-
Once your repo is created, click on the Code button and select Open with CodeSpaces.
-
This will spin up a new CodeSpace where you'll set up Rancher.
📝 Step 3: Install Docker in CodeSpaces
- In your CodeSpaces terminal, first, install Docker since Rancher will run as a Docker container. Here’s how:
sudo apt-get update
sudo apt-get install -y docker.io
- Verify Docker installation:
docker --version
🛠️ Step 4: Pull the Rancher Docker Image
- Run the following command to pull the Rancher image:
docker pull rancher/rancher:latest
This may take a while, so be patient! ⏳
🚀 Step 5: Start the Rancher Container
- Now that we have the Rancher image, let’s start the container:
docker run -d --restart=unless-stopped -p 80:80 -p 443:443 rancher/rancher
- Pause here for the container to start. 🛑
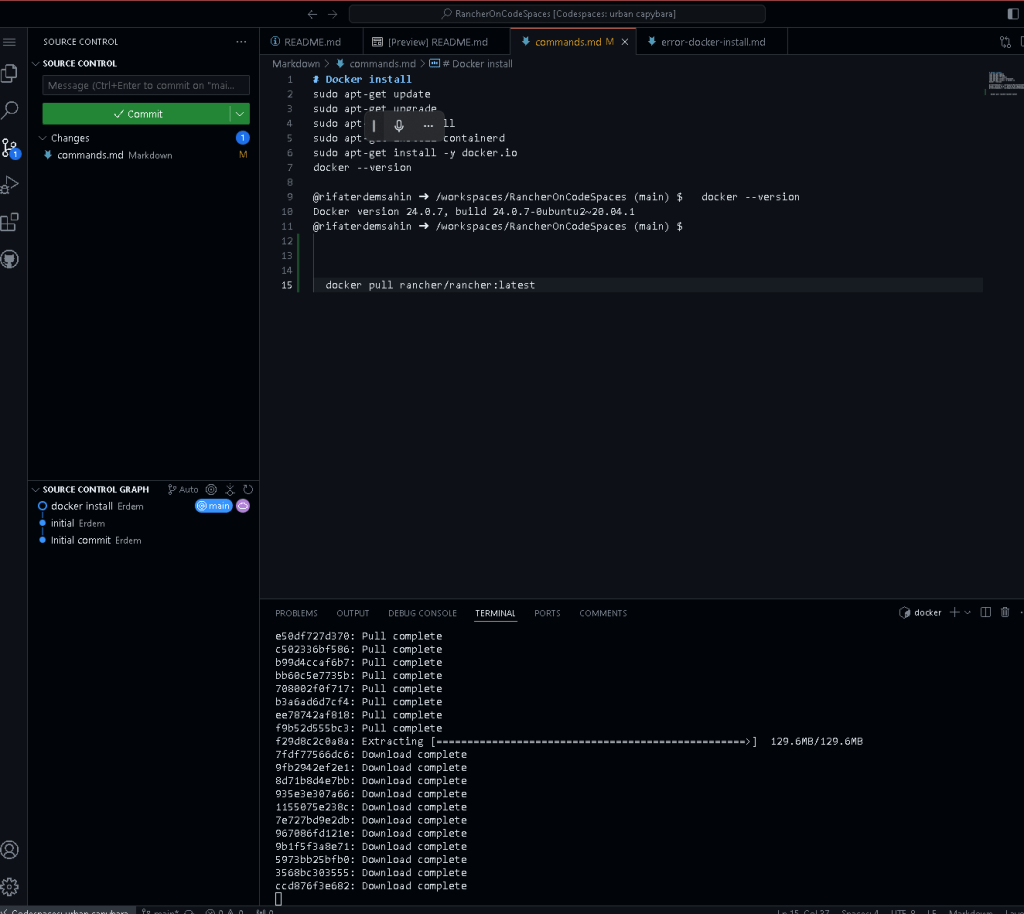
📸 Screenshot of Terminal at This Stage:
Ensure that you take a screenshot of your running terminal here for your blog readers to visually follow along!
📝 Step 6: Access Rancher UI
- Once Rancher is up and running, access the Rancher UI by navigating to:
http://localhost
- You should now see the Rancher login page! 🎉
🛠️ Step 7: Configure Rancher
- Follow the Rancher setup wizard to configure your admin account and start managing clusters.
💡 Bonus: Add Kubernetes Clusters
- From the Rancher dashboard, you can easily create or import Kubernetes clusters, giving you full control directly from within CodeSpaces.
🚀 Wrap-Up
You’ve now set up Rancher on GitHub CodeSpaces! This powerful combination allows you to manage Kubernetes clusters from within a fully cloud-based development environment.
💡 Next steps could include exploring Rancher's features, setting up more clusters, or integrating with other DevOps tools.
🔗 Connect with me:
-
💼 LinkedIn: Rifat Erdem Sahin
-
🐦 Twitter: Rifat on Twitter
-
🎥 YouTube: Rifat’s YouTube
-
💻 GitHub: Check out my GitHub
Happy Ranching! 🐄
Imported from rifaterdemsahin.com · 2025