WinScp Development
Creating a development project with WinSCP that you can submit to GitHub is a great way to practice your hands-on skills in file transfer automation, scripting, and version control. Here’s a step-by-step guide to help you create a simple yet practical project:
Project Overview
The goal of this project is to create a script using WinSCP's scripting capabilities to automate file transfer between a local machine and a remote server. You'll then upload this script to a GitHub repository.
Prerequisites
-
WinSCP Installed: Ensure you have WinSCP installed on your machine. You can download it from here.
-
Git and GitHub Account: Install Git and create a GitHub account if you haven't already.
Project Steps
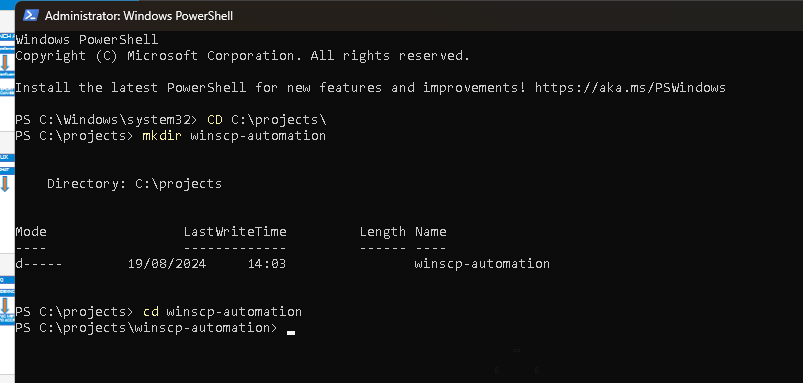
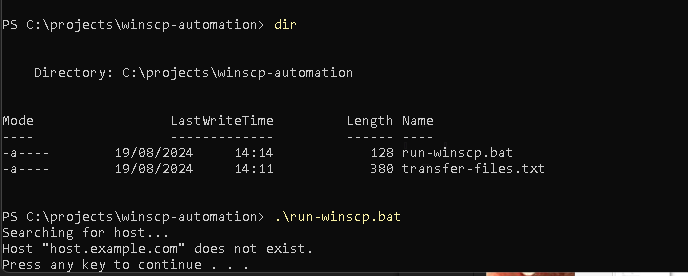
1. Create a Local Directory for Your Project
Create a directory on your local machine to hold your project files. For example:
mkdir winscp-automation
cd winscp-automation
2. Develop the WinSCP Script
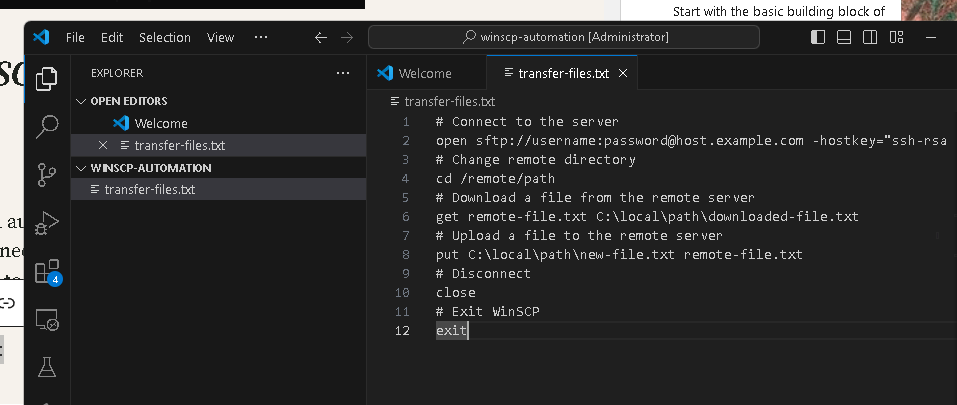
Create a WinSCP script that will automate the file transfer process. Here’s a basic example that connects to a remote server, downloads a file, and then uploads a new file to the server.
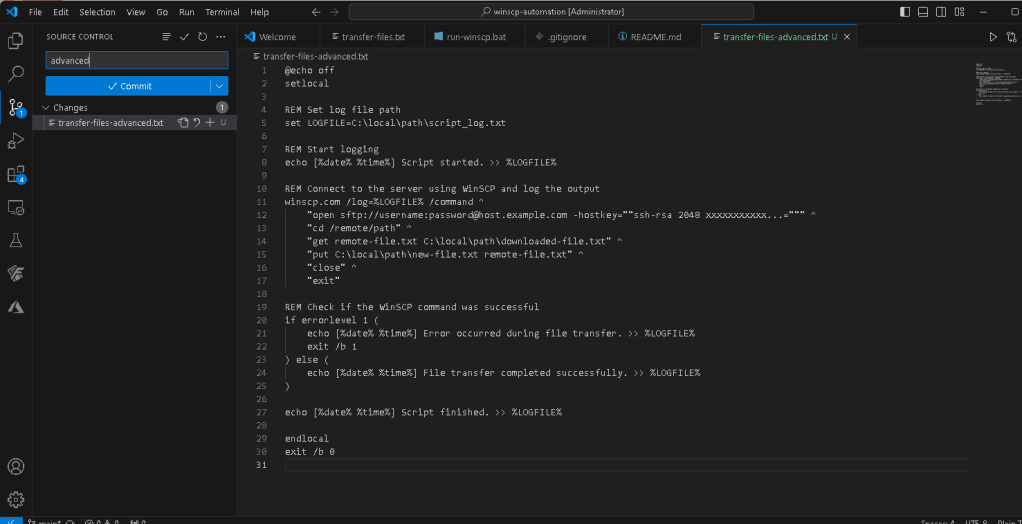
Example: transfer-files.txt
Connect to the server
open sftp://username:[email protected] -hostkey="ssh-rsa 2048 xxxxxxxxxxx...="
Change remote directory
cd /remote/path
Download a file from the remote server
get remote-file.txt C:\local\path\downloaded-file.txt
Upload a file to the remote server
put C:\local\path\new-file.txt remote-file.txt
Disconnect
close
Exit WinSCP
exit
Replace username, password, host.example.com, and the file paths with your actual details.
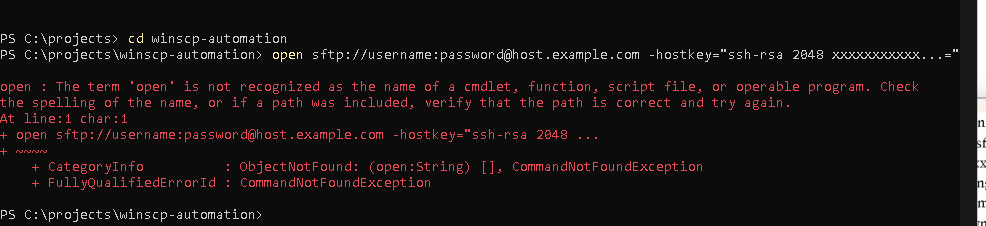
The error you're encountering suggests that the open command you're trying to run in the terminal is being interpreted by PowerShell as a regular command rather than part of a WinSCP script.
Here's how you can fix this issue:
-
Create a WinSCP Script File: Instead of typing the
opencommand directly into the terminal, put the command into a script file and then run that script using WinSCP. -
Create a Script File (
transfer-files.txt): Create a text file namedtransfer-files.txtin yourwinscp-automationdirectory with the following content:
open sftp://username:[email protected] -hostkey="ssh-rsa 2048 xxxxxxxxxxx..."
cd /remote/path
get remote-file.txt C:\local\path\downloaded-file.txt
put C:\local\path\new-file.txt remote-file.txt
close
exit
Replace the placeholders (username, password, host.example.com, etc.) with your actual credentials and paths.
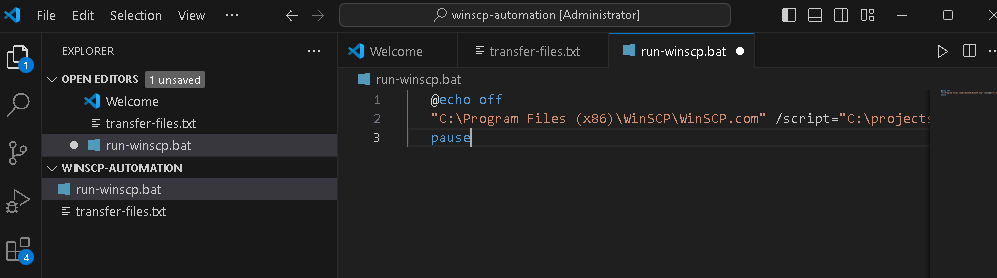
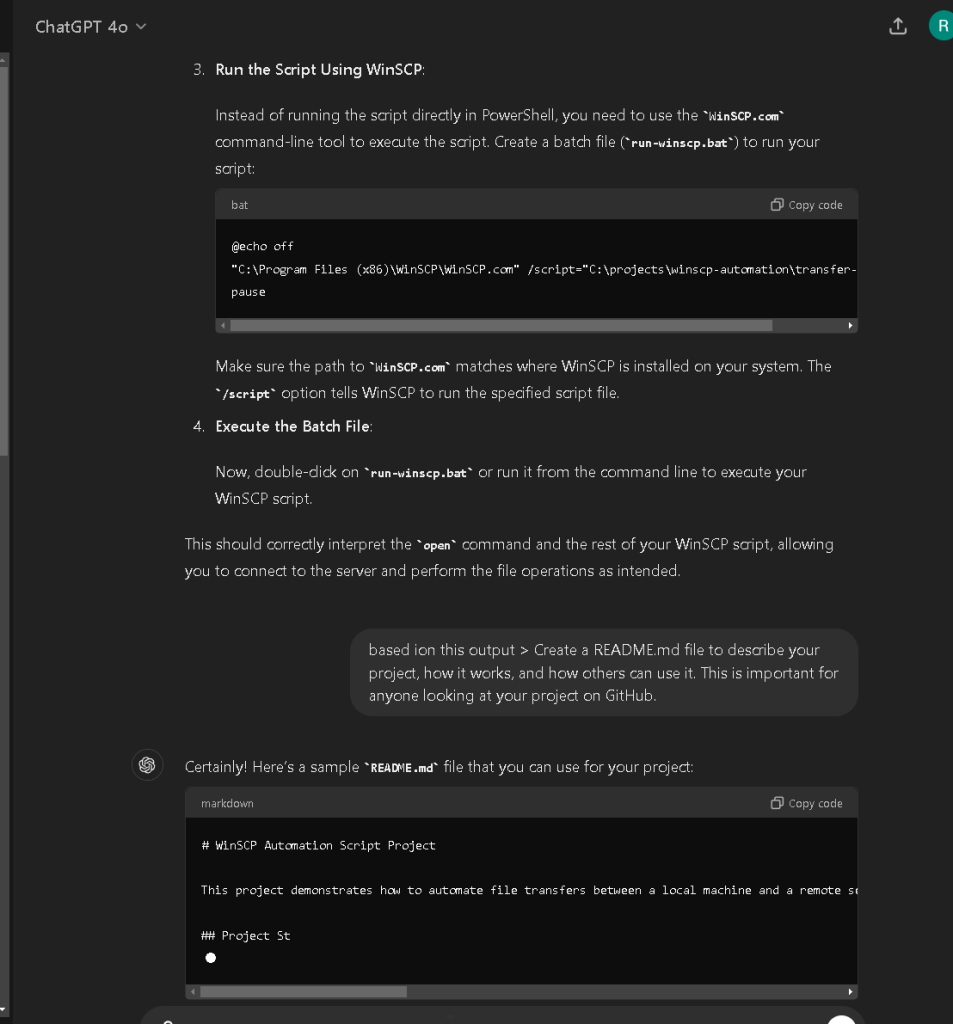
- Run the Script Using WinSCP: Instead of running the script directly in PowerShell, you need to use the
WinSCP.comcommand-line tool to execute the script. Create a batch file (run-winscp.bat) to run your script:
@echo off
"C:\Program Files (x86)\WinSCP\WinSCP.com" /script="C:\projects\winscp-automation\transfer-files.txt"
pause
Make sure the path to WinSCP.com matches where WinSCP is installed on your system. The /script option tells WinSCP to run the specified script file.
- Execute the Batch File: Now, double-click on
run-winscp.bator run it from the command line to execute your WinSCP script.
This should correctly interpret the open command and the rest of your WinSCP script, allowing you to connect to the server and perform the file operations as intended.
3. Automate the Script Execution with a Batch File
Create a batch file to execute your WinSCP script.
Example: run-winscp.bat
@echo off
echo Running WinSCP script...
"C:\Program Files (x86)\WinSCP\WinSCP.com" /script="C:\path\to\transfer-files.txt"
pause
Make sure the path to WinSCP.com and your script file is correct.
4. Test Your Script
Run the batch file (run-winscp.bat) to ensure that your script works correctly. Check that the file transfers are happening as expected.
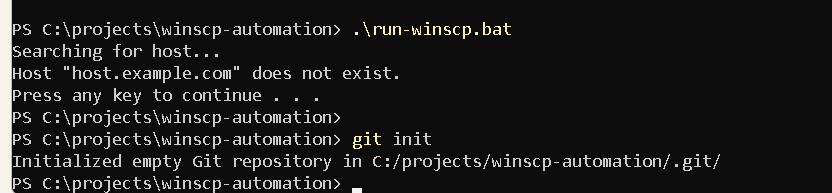
5. Initialize a Git Repository
Initialize a Git repository in your project directory:
git init
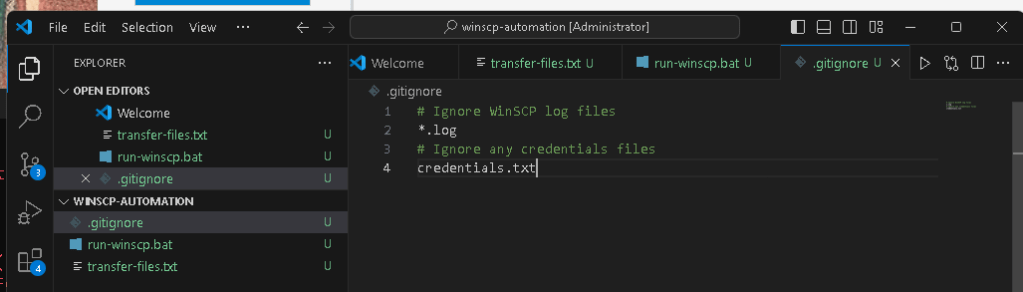
6. Create a .gitignore File
Create a .gitignore file to exclude unnecessary files from your Git repository. You might want to exclude temporary files or sensitive information.
Example: .gitignore
Ignore WinSCP log files
*.log
Ignore any credentials files
credentials.txt
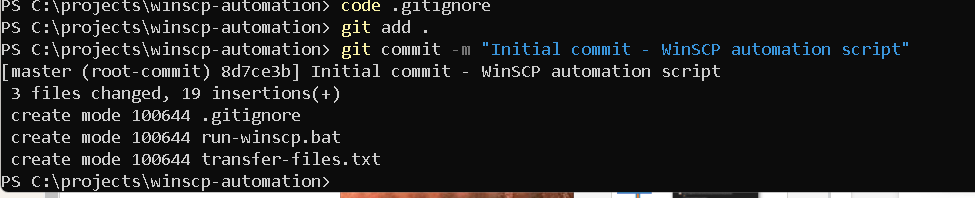
7. Commit Your Project to Git
Add your files to the repository and commit them:
git add .
git commit -m "Initial commit - WinSCP automation script"
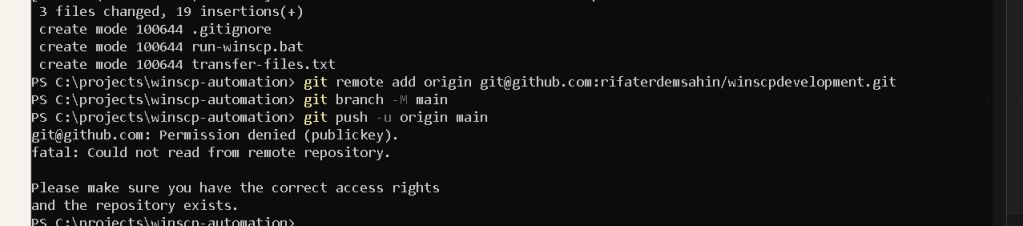
8. Create a GitHub Repository
Go to GitHub and create a new repository. Follow the instructions to push your local repository to GitHub.
Example:
git remote add origin [email protected]:rifaterdemsahin/winscpdevelopment.git
git branch -M main
git push -u origin main
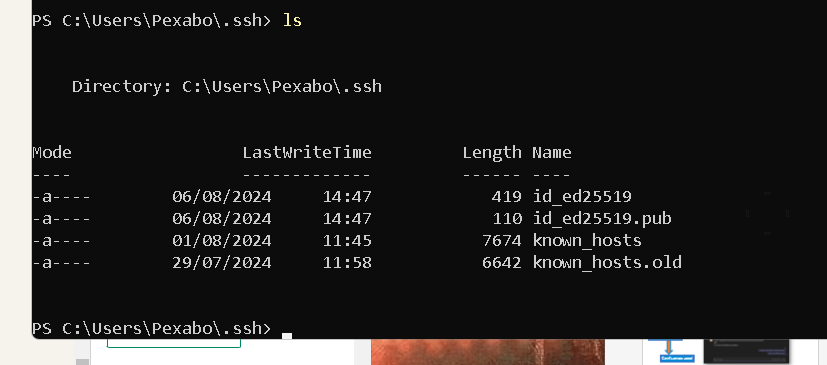
Reading an SSH key on a Windows system involves locating the key files and viewing them. Here's a step-by-step guide to help you find and read your SSH key:
1. Locate the SSH Key
-
SSH keys are typically stored in the
.sshdirectory within your user profile folder. By default, this directory is located at:
C:\Users\YourUsername\.ssh -
The key files are usually named
id_rsa(for the private key) andid_rsa.pub(for the public key). However, they might have different names if you specified a custom name when generating the key.
2. Open the SSH Key File
- To view your SSH key, you can use a text editor like Notepad, Notepad++, or any other text editor. Here’s how you can open the key file:
Using Notepad:
Right-click on the SSH key file (e.g., id_rsa or id_rsa.pub).
-
Choose "Open with" and select "Notepad" from the list of programs.
-
Using Command Prompt or PowerShell:
Open Command Prompt or PowerShell. -
Navigate to the
.sshdirectory using thecdcommand:
cd C:\Users\YourUsername\.ssh -
Use the
typecommand to display the contents of the key file:
type id_rsa -
For PowerShell, you can use:
cat id_rsa -
Using a Text Editor:
If you prefer a text editor like Notepad++, right-click on the key file and choose "Edit with Notepad++" or open the file directly from the text editor.
3. Copy or Save the Key
- After opening the file, you can copy the SSH key to your clipboard or save it elsewhere as needed. Be careful when handling your private key (
id_rsa) as it should be kept secure and not shared with anyone.
Important Notes:
-
Do Not Modify: Be careful not to accidentally modify your SSH key files, as this could render them unusable.
-
Security: Ensure that your private key (
id_rsa) remains secure. Never share it with anyone or expose it in unsecured locations.
Following these steps, you should be able to locate, view, and manage your SSH key on a Windows system.
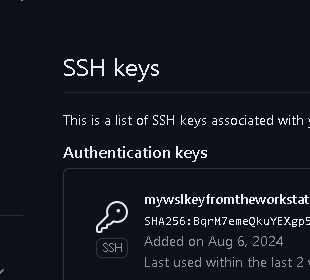
ssh-keygen -t rsa -b 4096 -C "[email protected]" >>> update with your email >>> the default push is with id_rsa.pub in the github


9.Document Your Project
Create a README.md file to describe your project, how it works, and how others can use it. This is important for anyone looking at your project on GitHub.
Example: README.md
WinSCP Automation Script
This project contains a script to automate file transfers between a local machine and a remote server using WinSCP.
Requirements
- WinSCP installed on your local machine
- A remote server with SFTP access
- Basic knowledge of scripting and batch files
How to Use
- Update the
transfer-files.txtscript with your server details and file paths. - Run
run-winscp.batto execute the script. - The script will download and upload files as specified.
License
This project is open-source and available under the MIT License.
10. Push Your Changes to GitHub
Ensure all your changes are committed and then push them to your GitHub repository.
git add README.md
git commit -m "Add README and final project files"
git push
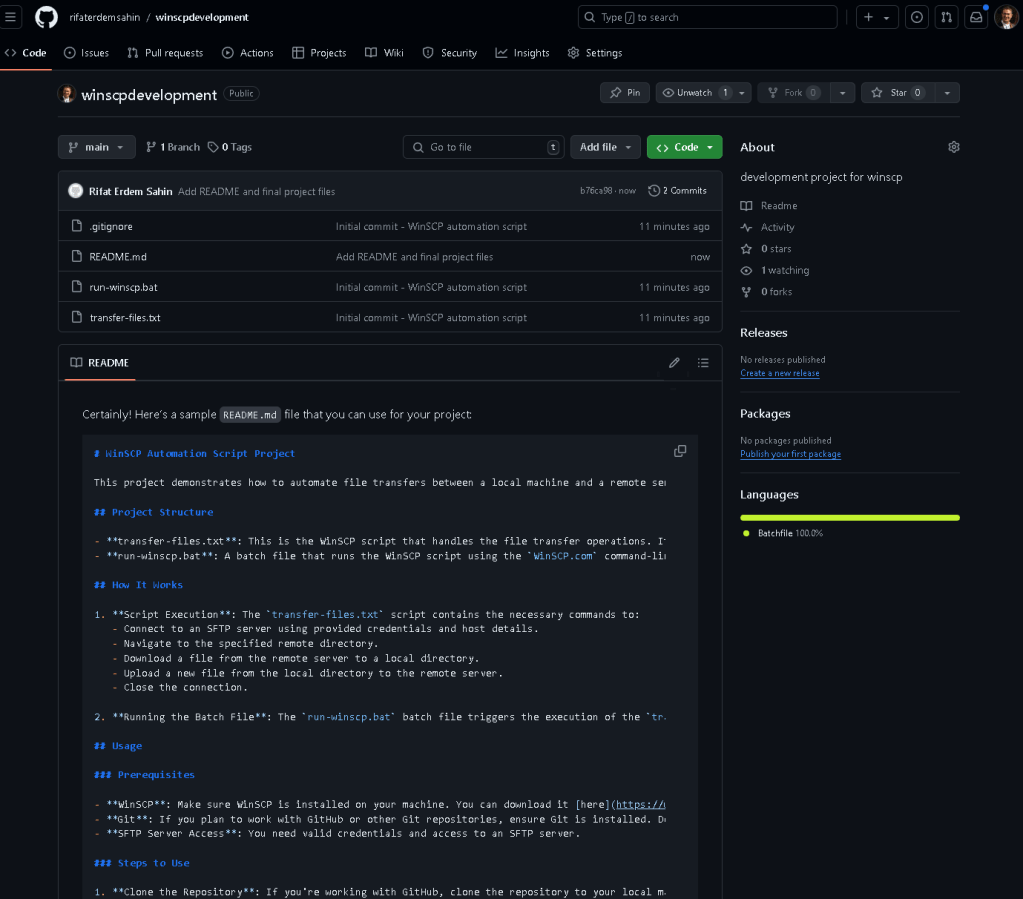
Project Submission
Now your project is live on GitHub, and you can share the link as part of your portfolio or in a submission for a course or job application.
https://github.com/rifaterdemsahin/winscpdevelopment
Bonus: Extending the Project
-
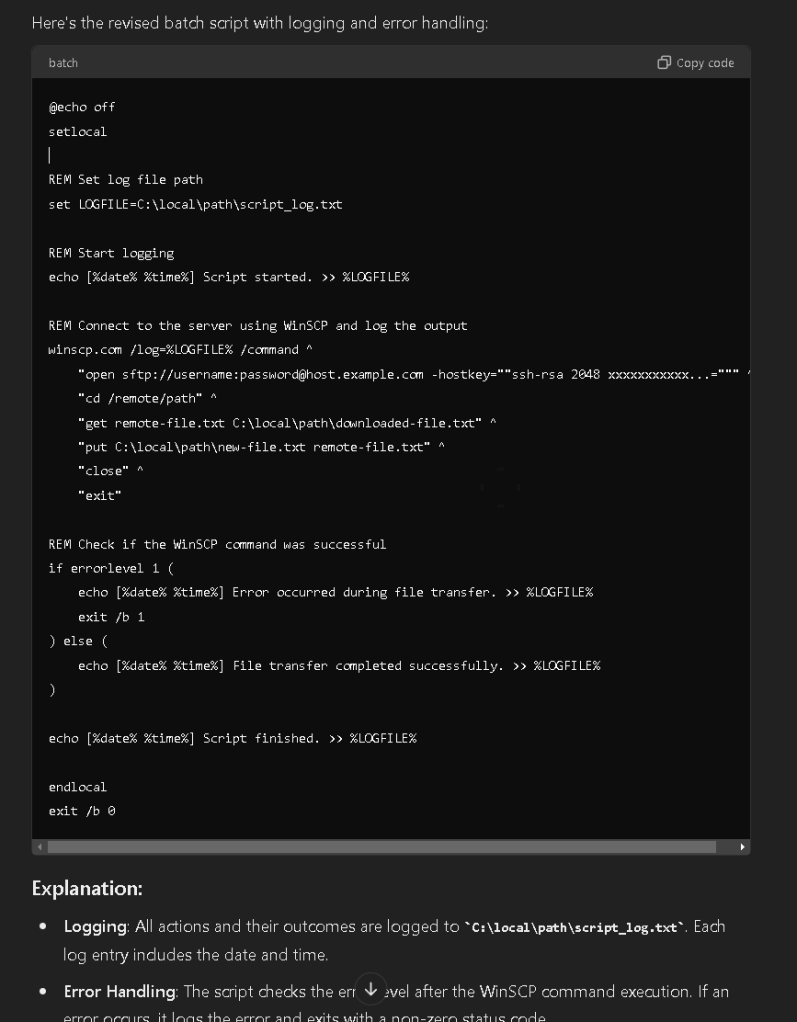
Logging: Enhance the script to log its operations to a file.
-
Error Handling: Add error handling in the batch script to manage failures.
-
Scheduling: Automate the script execution using Windows Task Scheduler.
This project not only gives you hands-on experience with WinSCP and scripting but also familiarizes you with version control and GitHub, which are essential skills for many development and IT roles.
Connect with me:
-
LinkedIn: https://www.linkedin.com/in/rifaterdemsahin/
-
Twitter: https://x.com/rifaterdemsahin
-
YouTube: https://www.youtube.com/@RifatErdemSahin
Imported from rifaterdemsahin.com · 2025