🎬 How to Export Multiple Timelines Separately in DaVinci Resolve for Canva Ingest 🌐
Exporting timelines individually in DaVinci Resolve can help streamline your project for platforms like Canva, where individual scenes or topics can be imported and edited separately. Here’s a step-by-step guide to exporting each timeline as its own video file for easy upload and management on Canva.
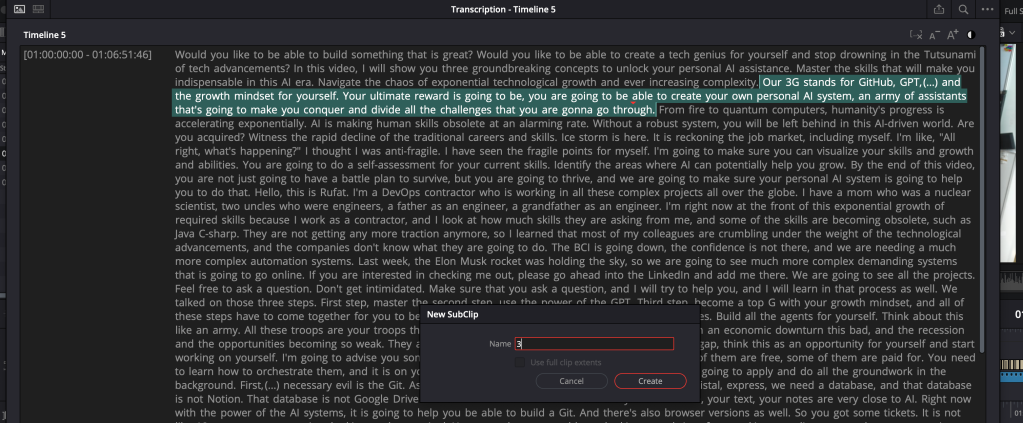
Sub clips are the way to go
🚀 Step 1: Export Each Timeline Separately
-
Go to the Timeline You Want to Export: Open DaVinci Resolve, and in the Media Pool, double-click the timeline you’d like to export. Ensure that only the relevant timeline is active.
-
Switch to the Deliver Page: At the bottom of DaVinci Resolve, click on the Deliver tab to access export options.
-
Set Up Your Export Settings:
-
Name Your File: Use descriptive names for each timeline (e.g., "Intro.mp4," "Main_Points.mp4," "Conclusion.mp4") to help with semantic organization in Canva.
-
Format: Select MP4 or MOV – these are compatible with Canva.
-
Resolution and Frame Rate: Match these to your project settings or adjust them to fit Canva's specifications.
-
Timeline create as master
-
Create sub clips with number index
-
Start the Export after adding all subclips
🎨 Step 2: Ingesting Files into Canva for Organized Editing
Once you’ve exported each timeline, here’s how to structure and import them efficiently into Canva:
-
Upload Files in Batches by Theme or Sequence: Go to Canva and upload the exported timelines (Intro, Main Points, Conclusion) in a structured batch to keep your workspace organized.
-
Use Folders in Canva: Create folders in Canva with each section's theme (e.g., “Intro,” “Main Content,” “Conclusion”) to quickly locate and edit clips.
-
Label Clips Clearly: Label each upload with clear, semantic names to maintain easy reference and context for your project.
🎉 Tips for Organizing Timelines for Canva Projects
-
Consistent Naming: Use a naming convention that reflects the content or sequence of each timeline for quick identification in Canva (e.g., “Part1_Intro,” “Part2_Conclusion”).
-
Upload Order: Upload timelines in the sequence they will appear in your final video for seamless editing on Canva.
Using this method, your individual scenes will be organized and ready for Canva, making your project easier to edit, arrange, and enhance with text, animations, or graphics!
🔗 Connect with me:
Happy editing! 🎉
Imported from rifaterdemsahin.com · 2024