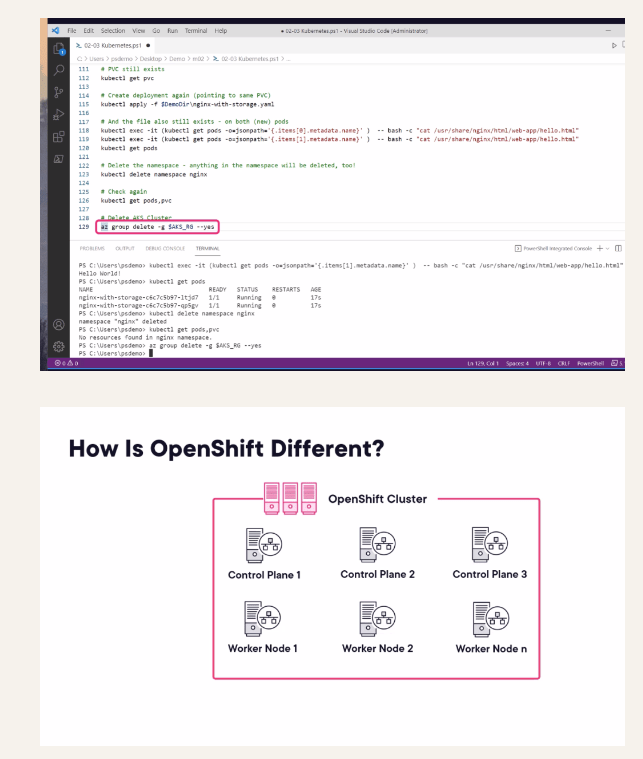
Openshift Host Continue on the setup ( OS Part 2 )
Main Script > My Goal to do everything there > Convert into a single skill and add the course/skill ware part /
Would be an add on to linkedin >
why > https://rifaterdemsahin.com/2024/04/09/why-complete-the-openshift-creation/
gcp focus > https://rifaterdemsahin.com/2024/04/05/hackerrank-focus/
Customers are there >>> learn agents from all not only azure onpremises gateway
miro board > https://miro.com/app/board/uXjVNi9RlUg=/
Move on From here > https://rifaterdemsahin.com/2024/03/04/openshift-course-pluralsight/
Pink Machine start
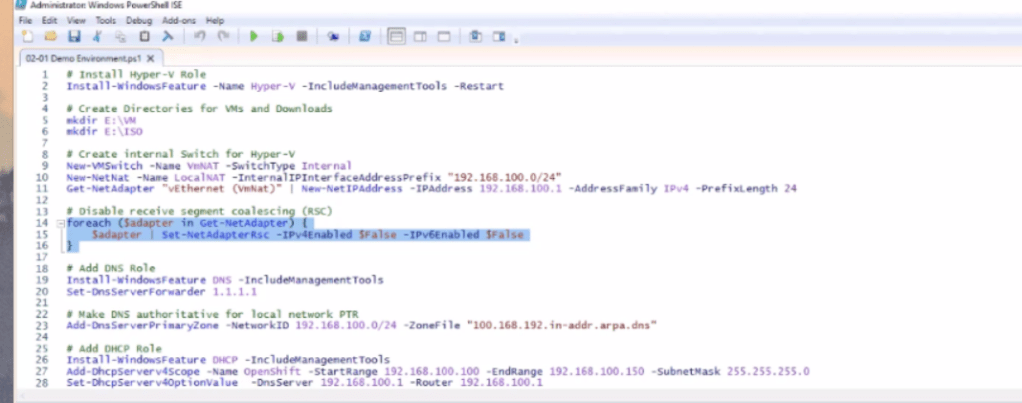
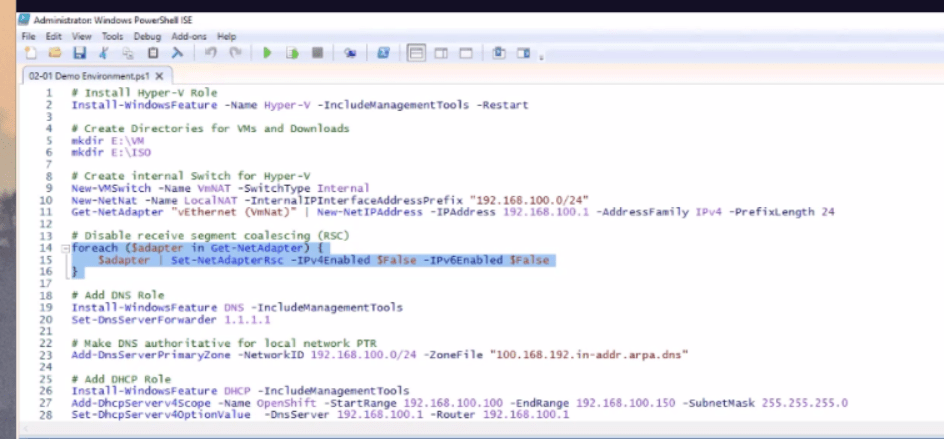
The powershell script has other parts in this
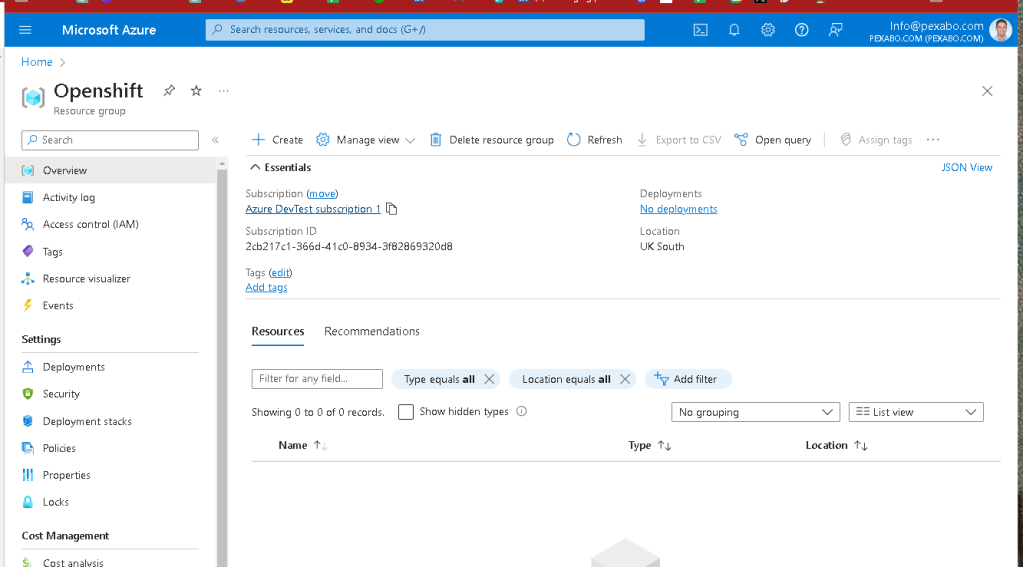
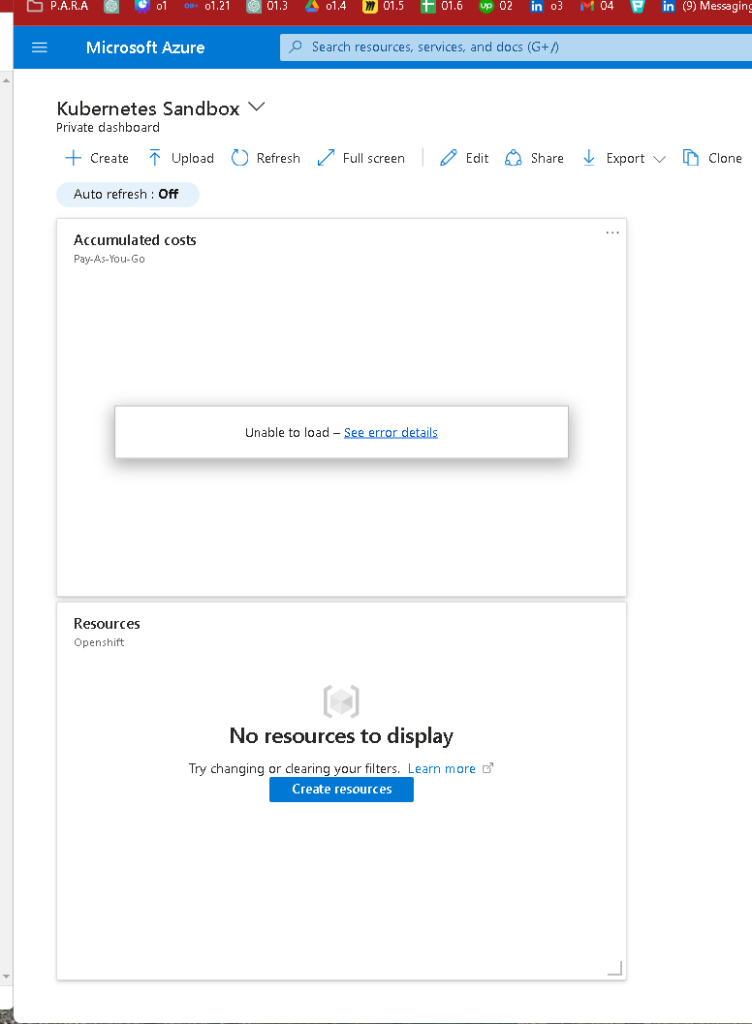
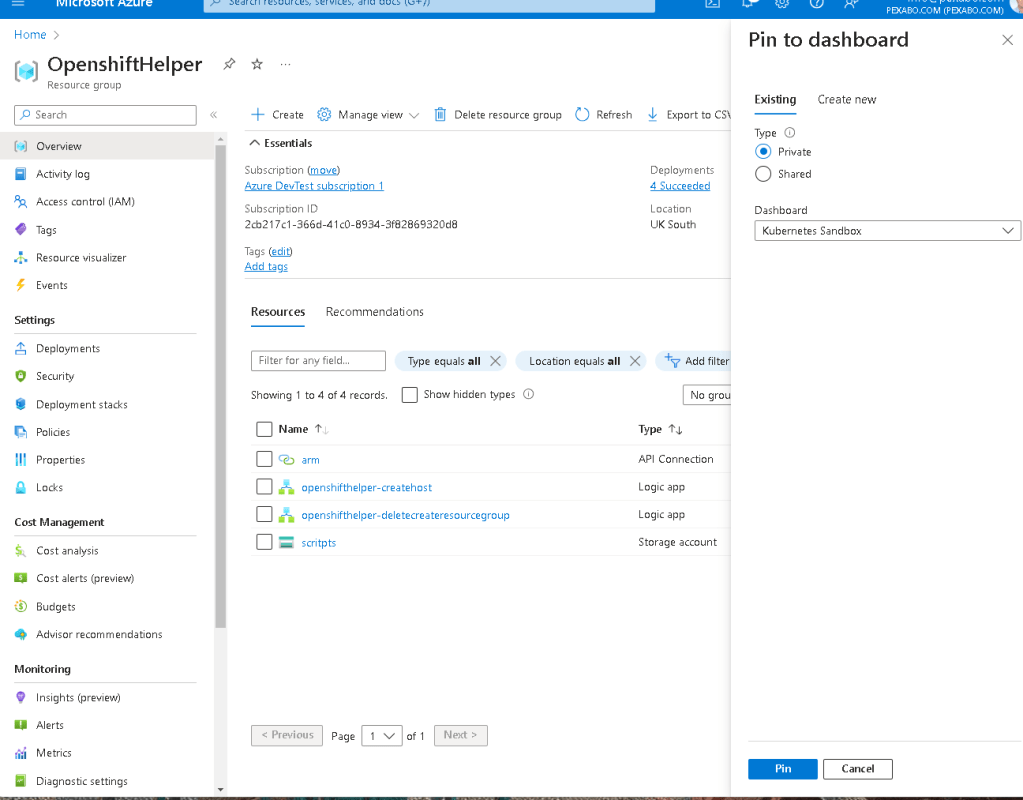
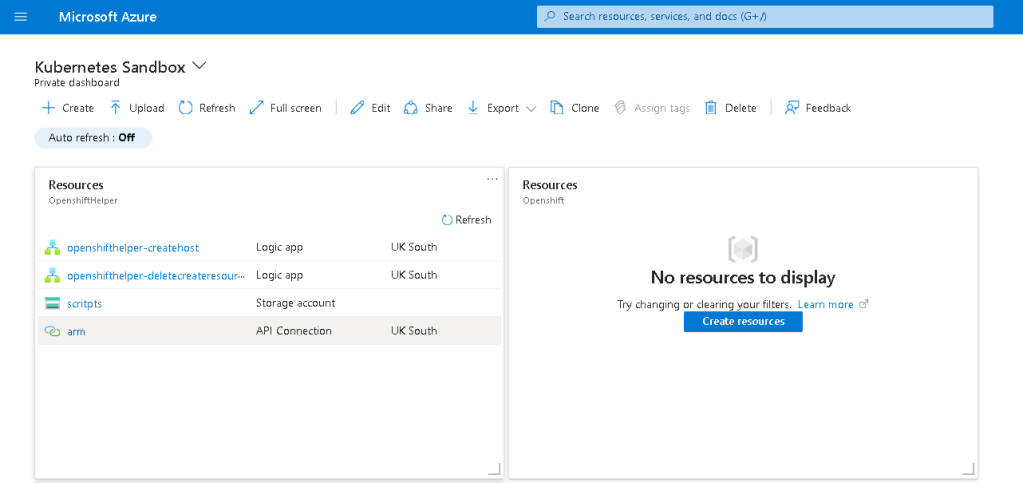
Start empty
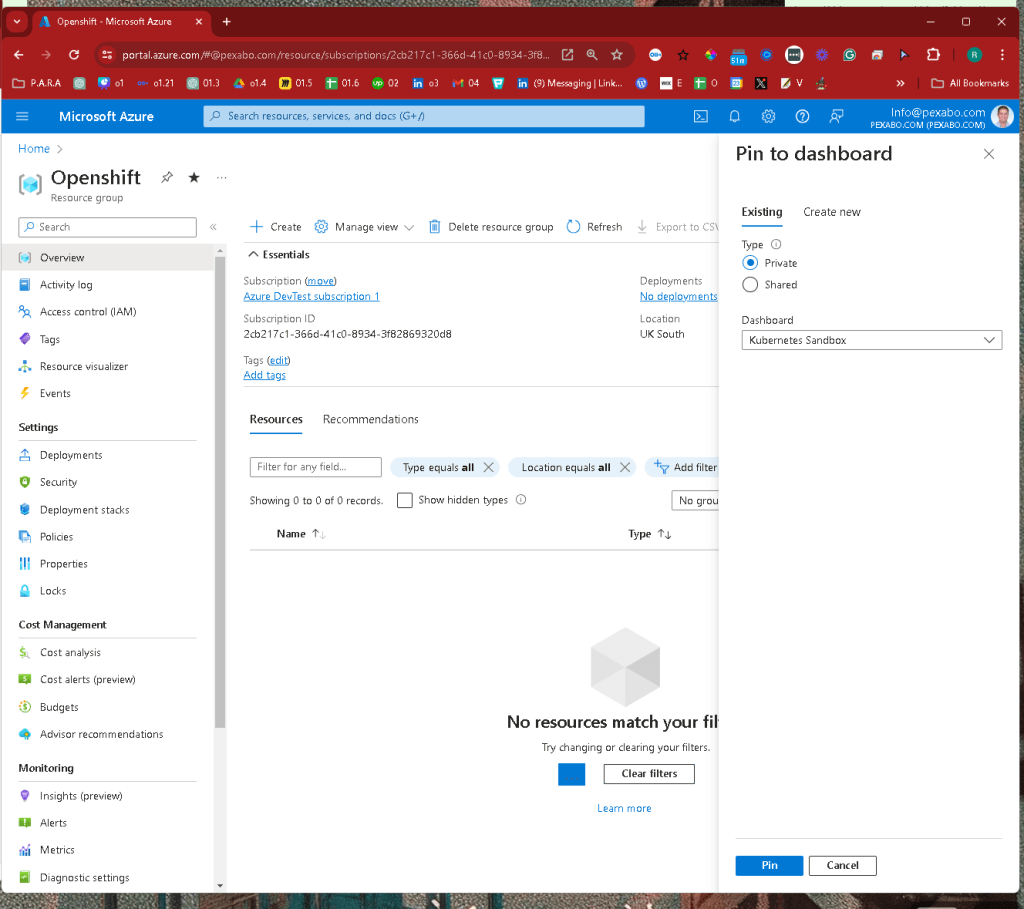
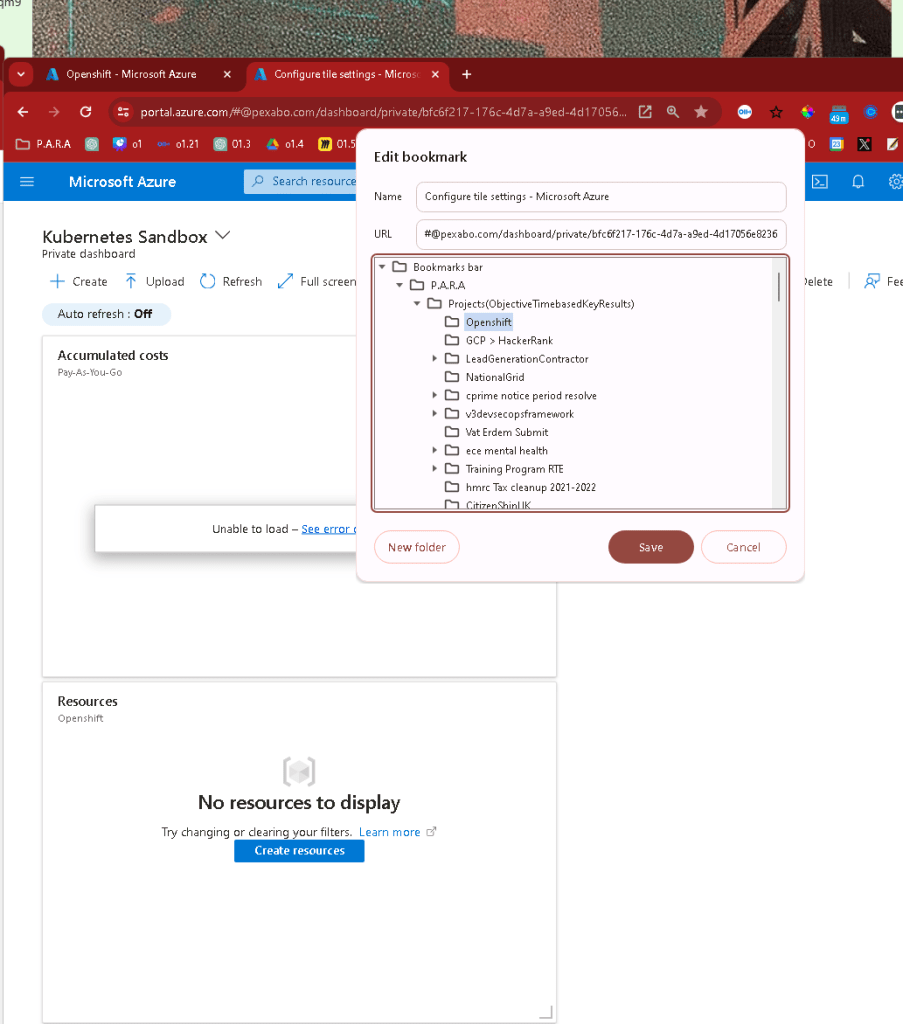
Add to dashboard
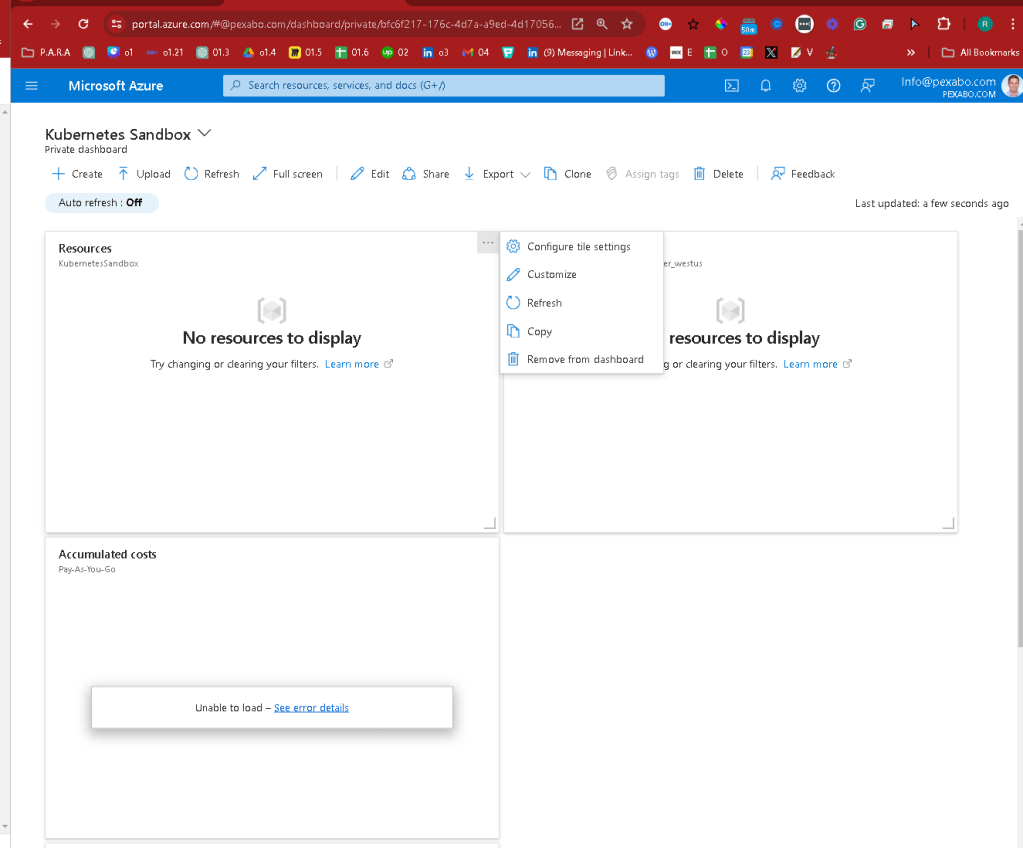
remove the old ones keep it active
add to open shift
Looks like he installed on windows not the linux enviroment
Place we are trying to reach > While Andres outlines the estimation for his work!
Hassle and demo would be great on Linkedin > Nana created a course in a package!
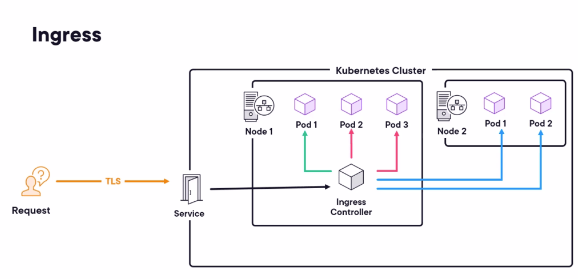
AKS and nginx is there
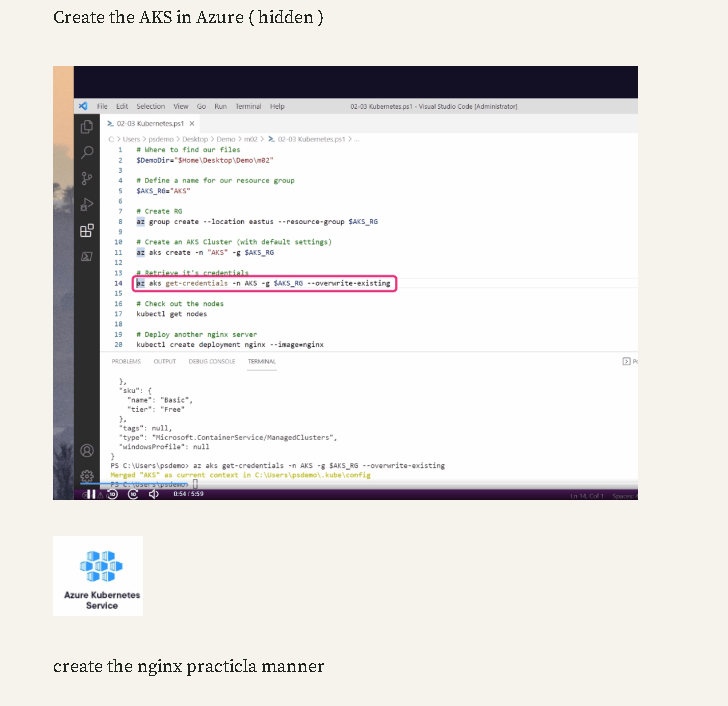
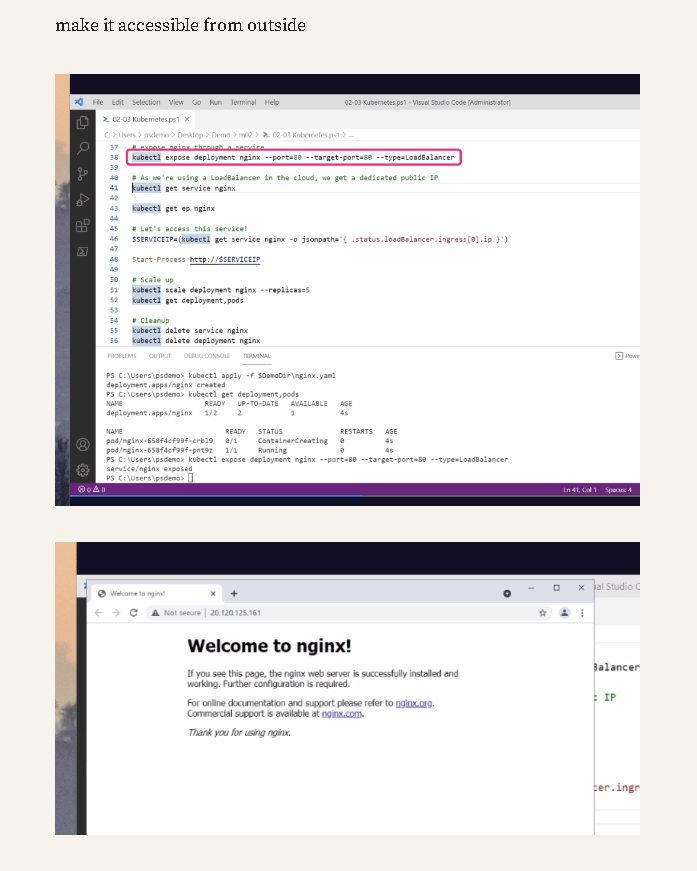
AKS practical expose is there
Both are different > he used the windows on the kubernetes example which gives 2 sided examples to market on
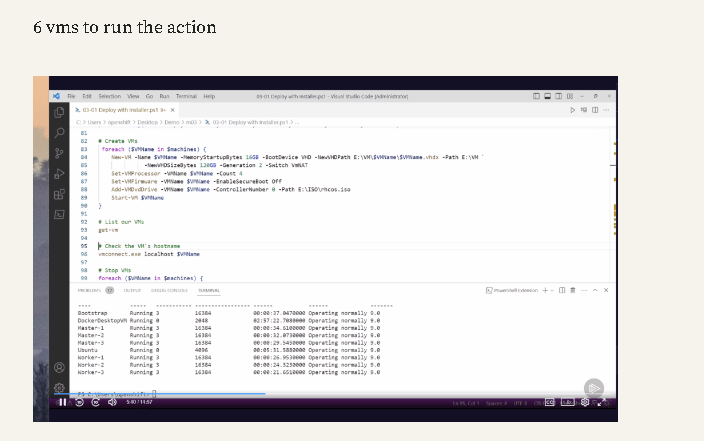
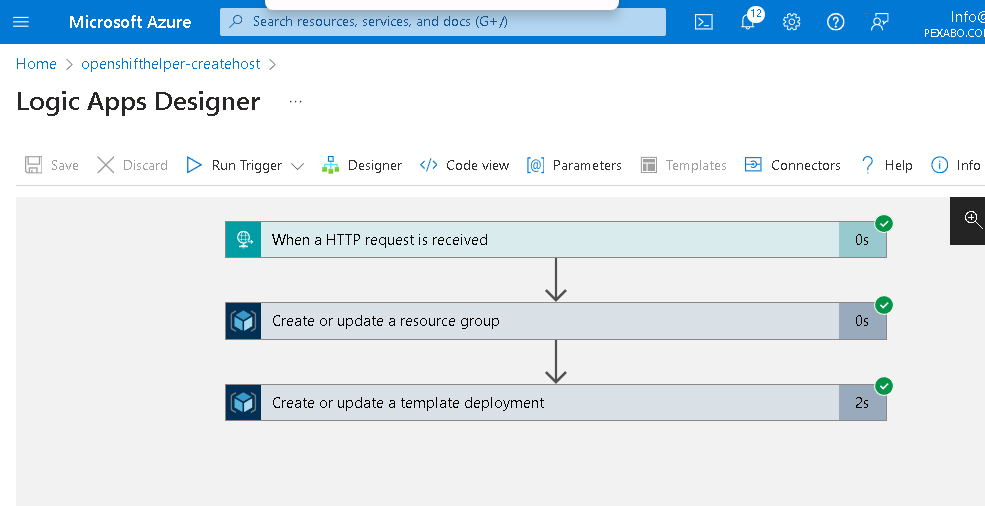
Today i expect to have these

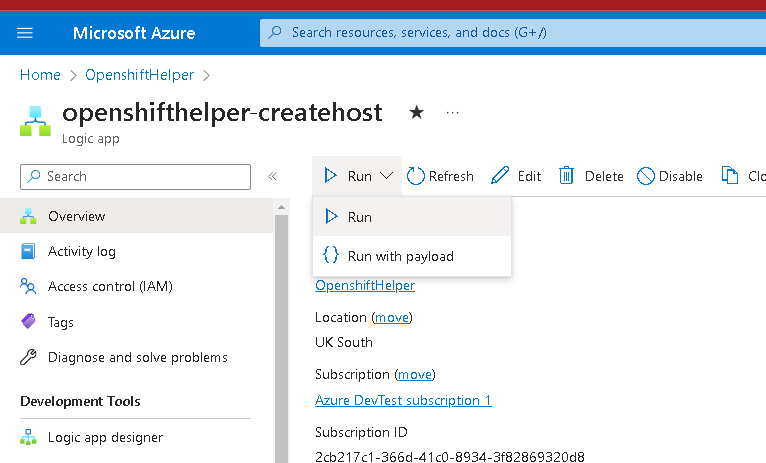
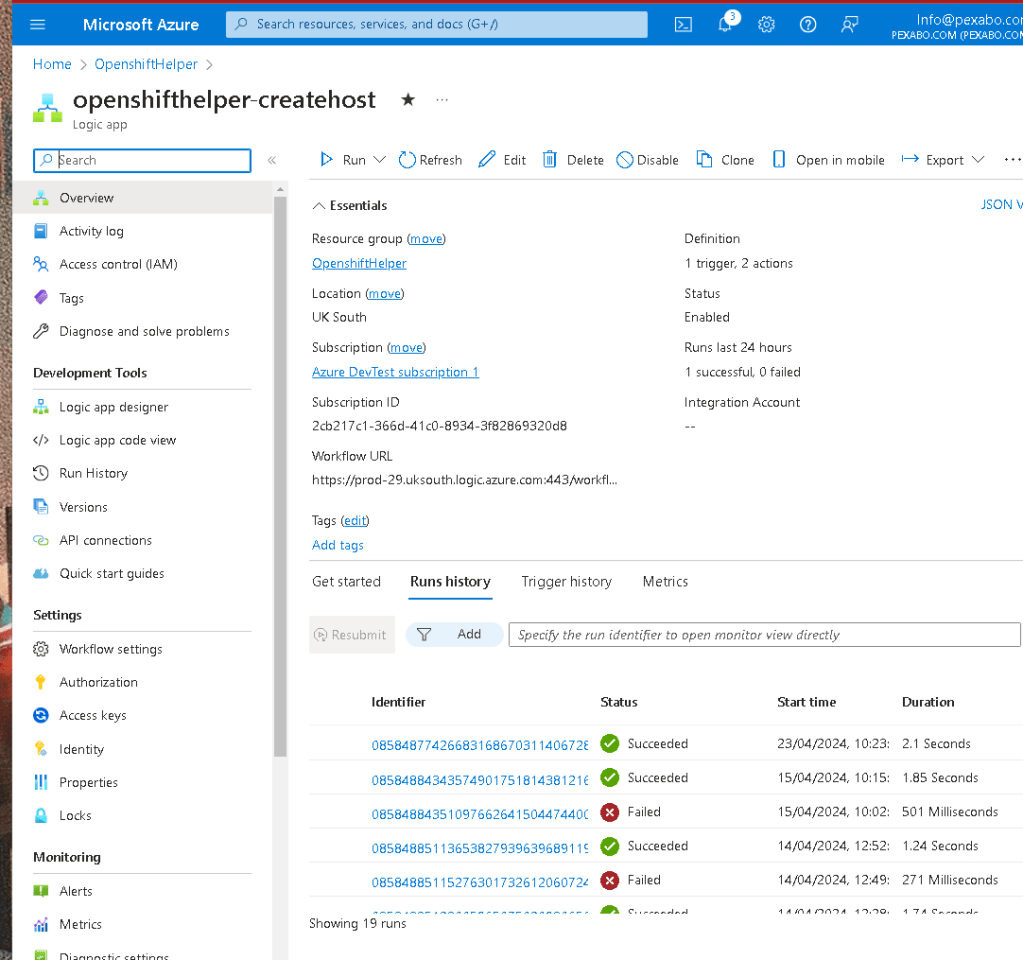
would trigger the create host
Manually get the diff of the linux install and fix it
ask your wishes
https://twitter.com/rifaterdemsahin/status/1782702096543818002
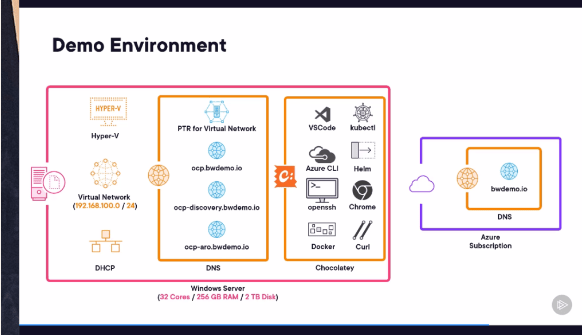
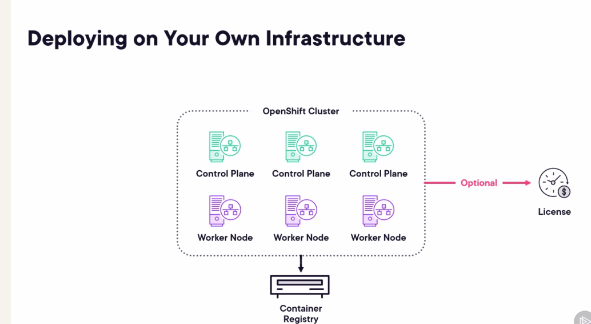
2 boxes to deliver
nginx would be used
Multiple controllers with one regfistry outside > delete them not to have cost!
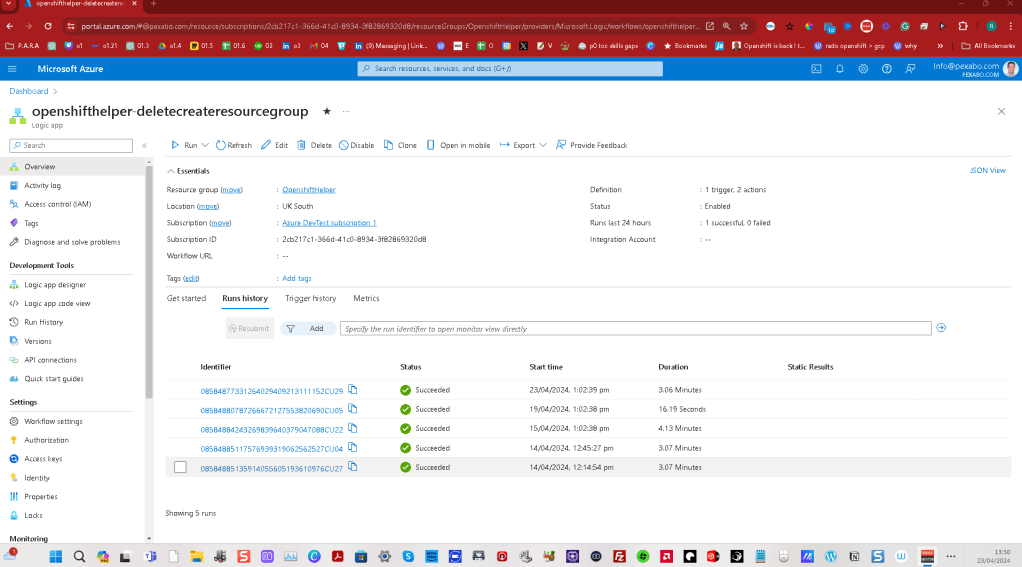
Delete all with speed
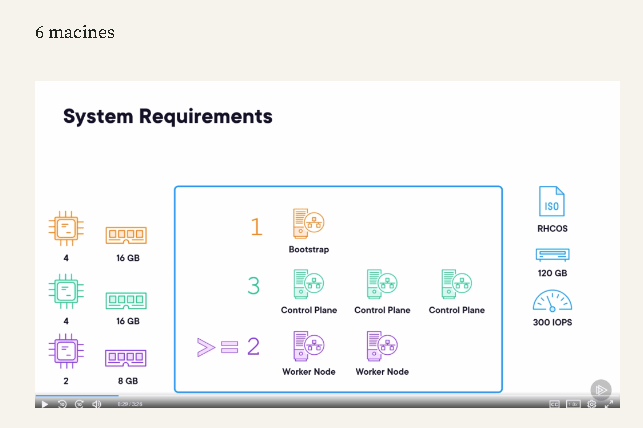
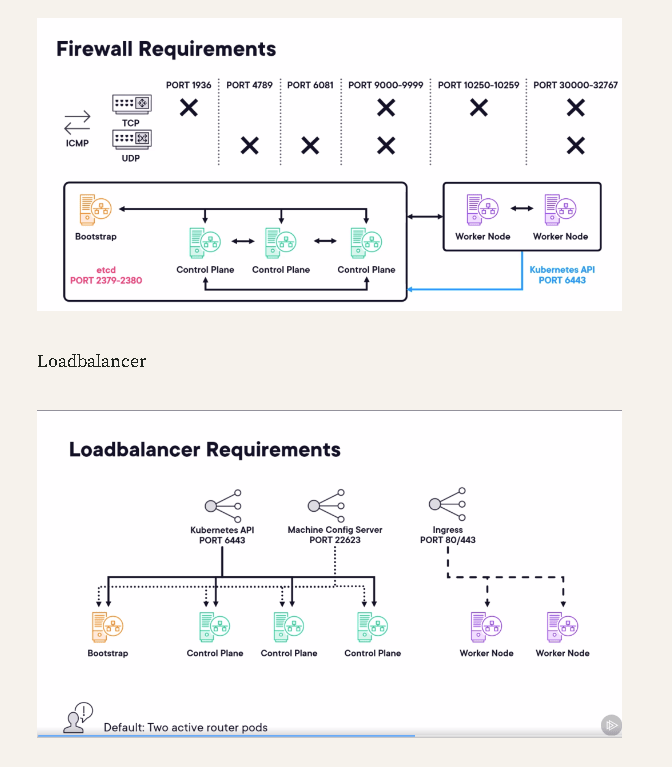
Services and requirements
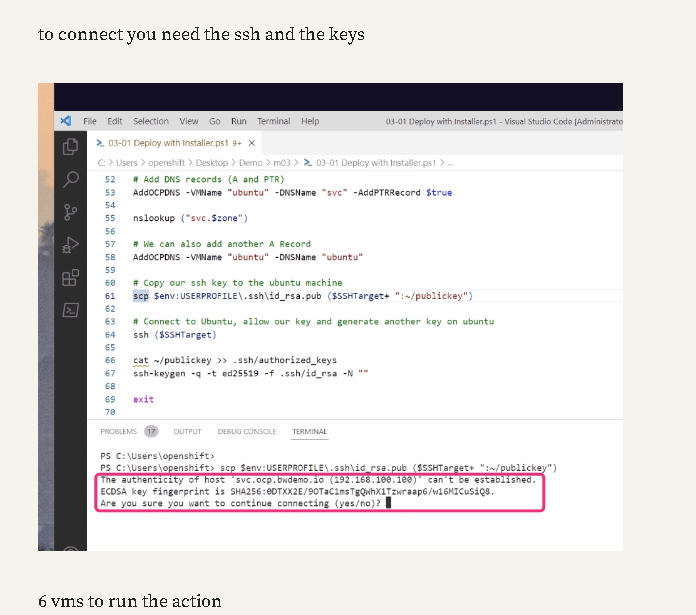
setting up the access is the key
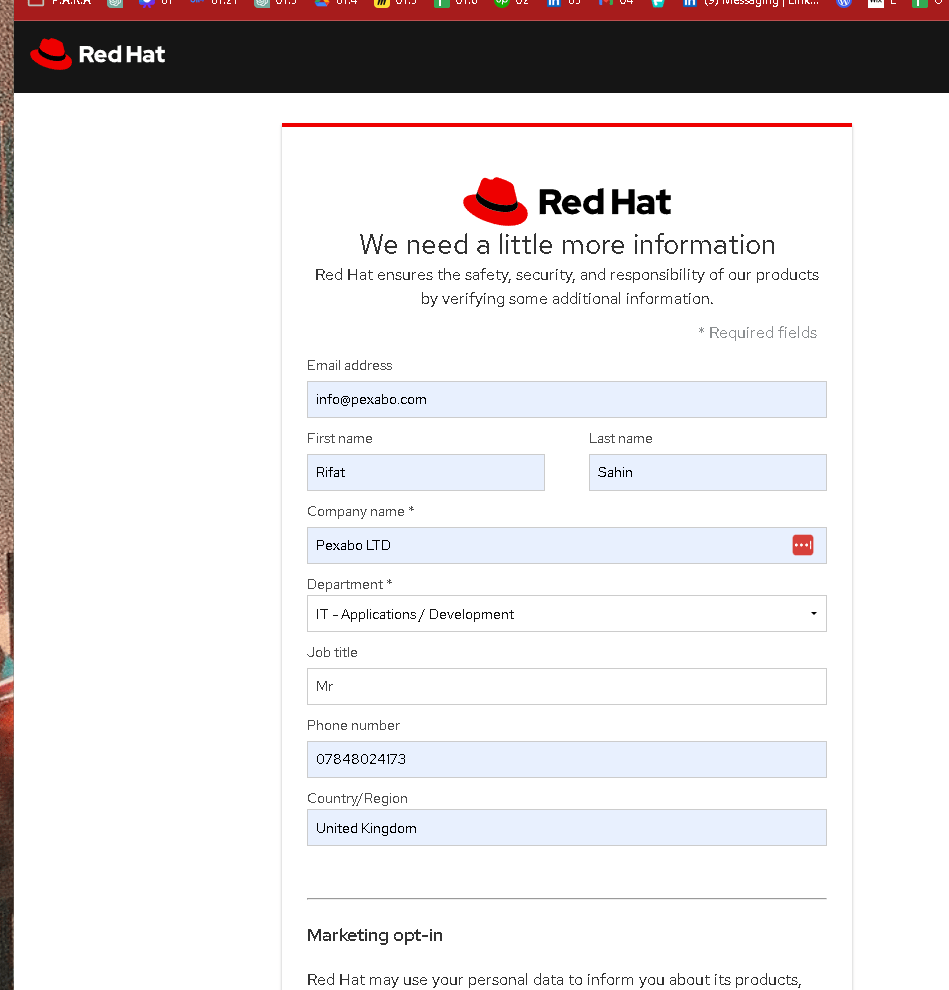
redhat account
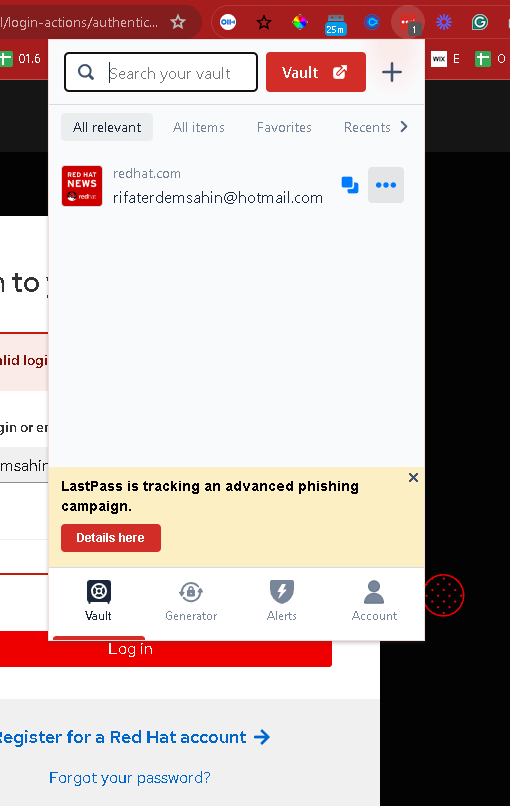
Lastpass fixed
More data
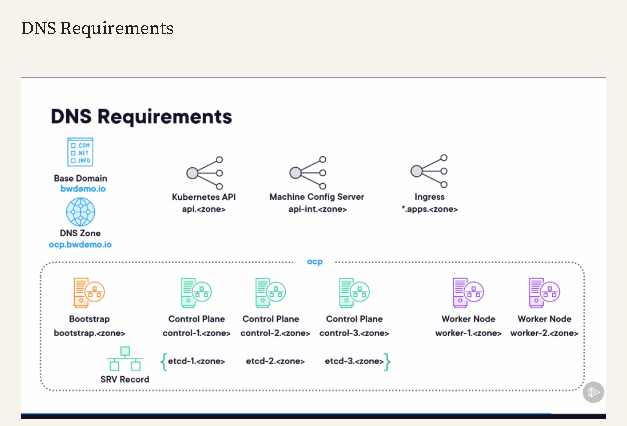
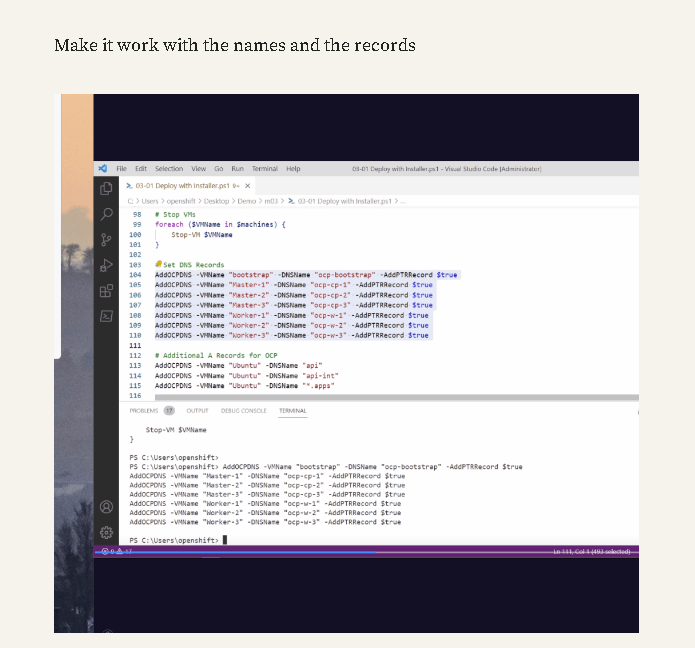
dns task automated
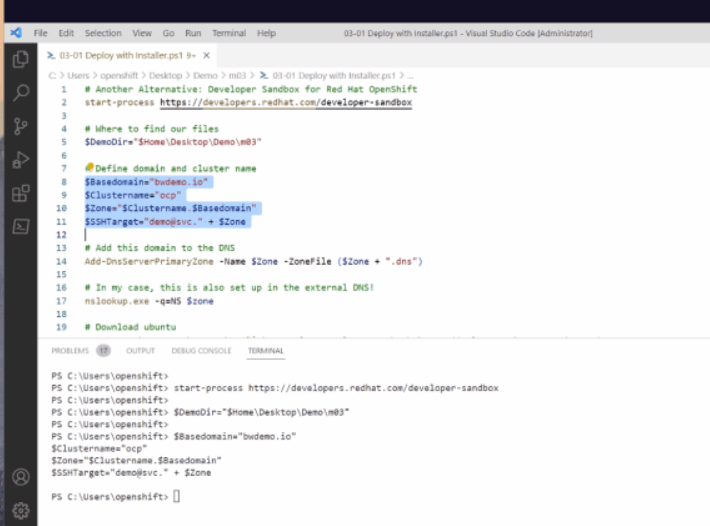
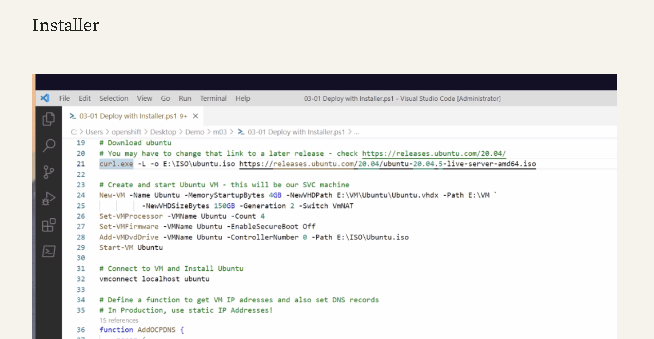
he is setting up his own version of ubuntu there
dns and connectivity of the host is also another project
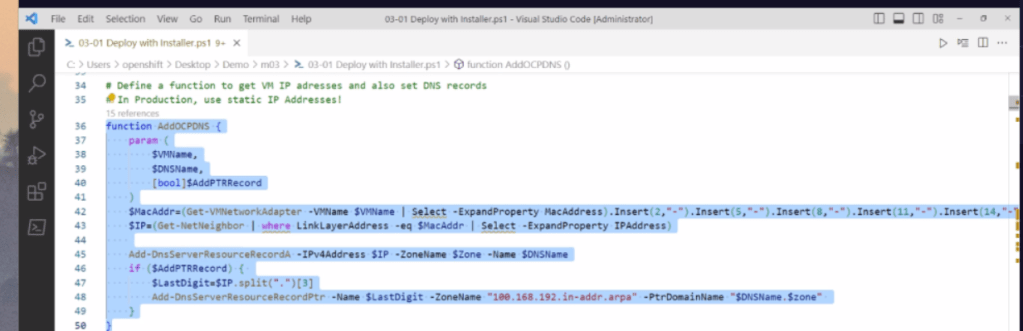
PTR getting added
dont target that step >>> still the ubuntu is the one that he downloaded...and created!
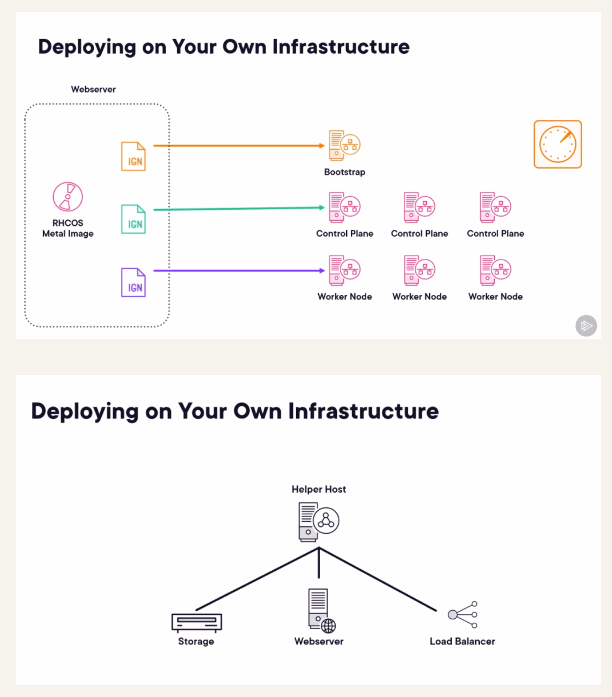
he uses the bootstap for the inital machine name
My Steps >
Change the deployment to ubuntu latest version
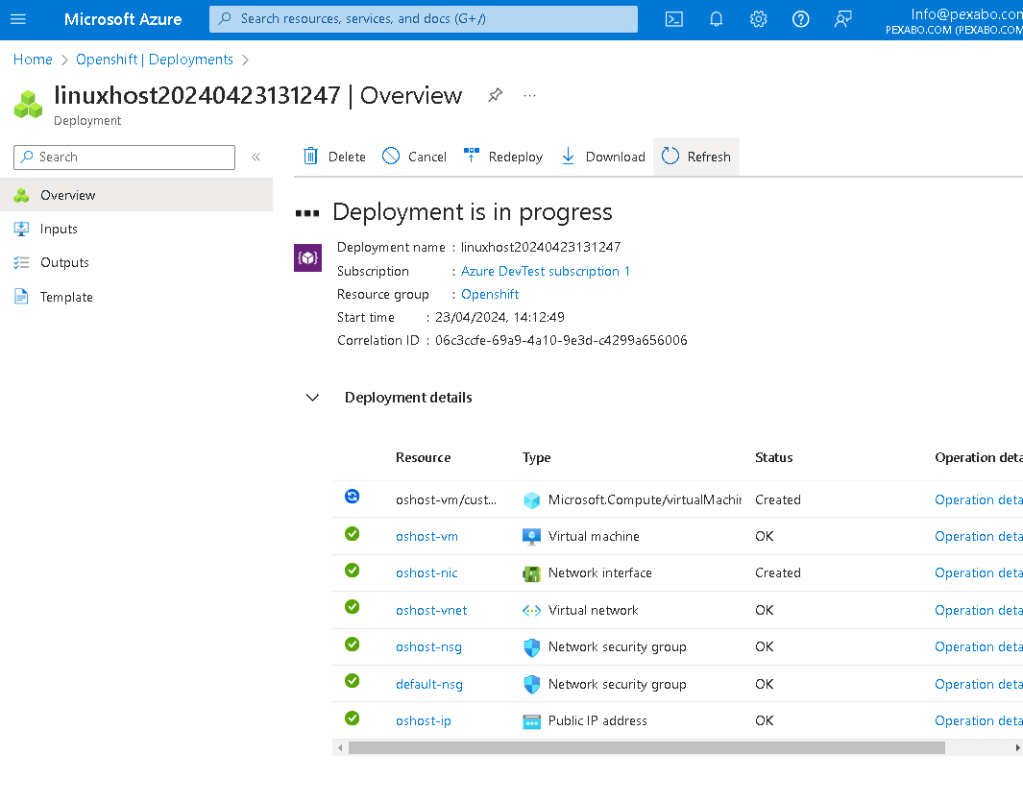
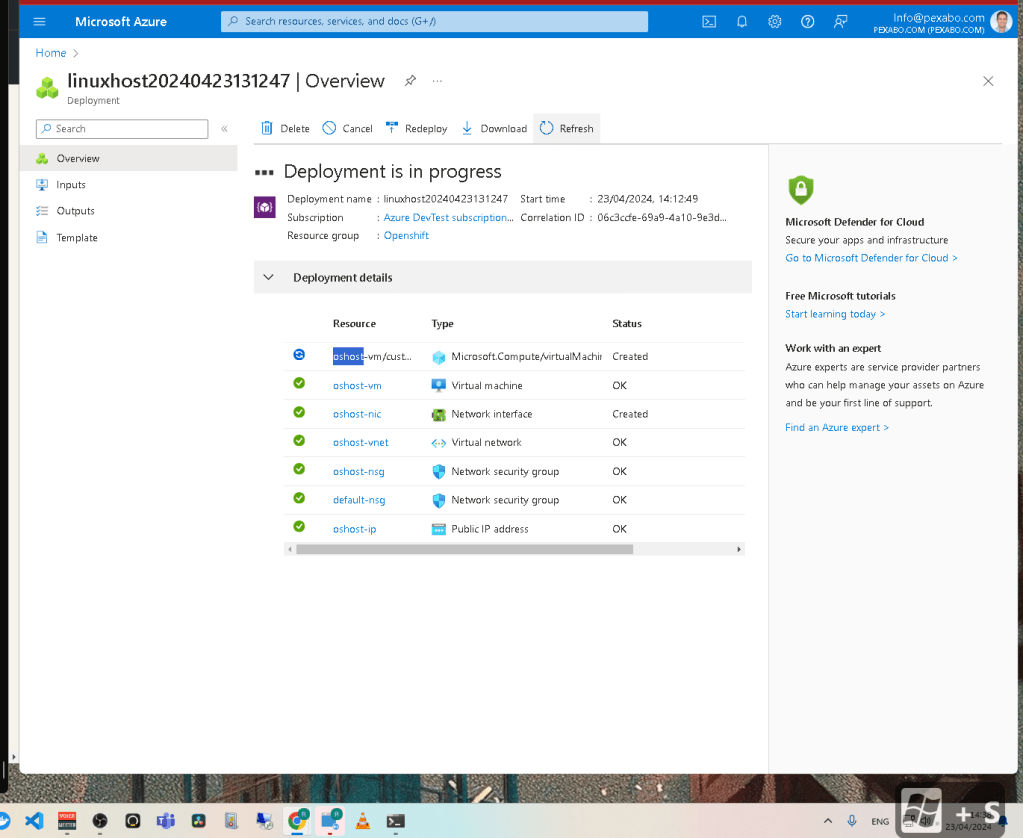
Next Stage the vm gets created and the Openshift gets installed
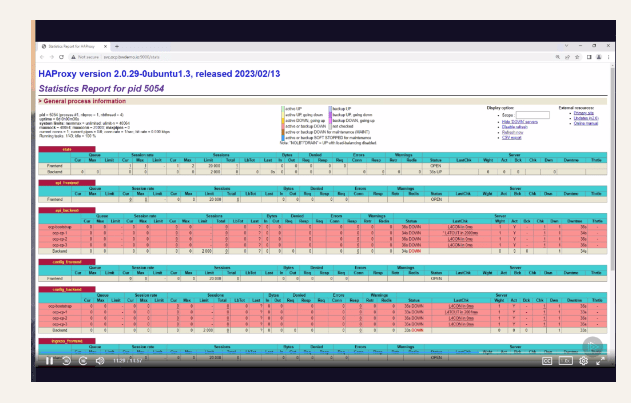
haproxy to manage
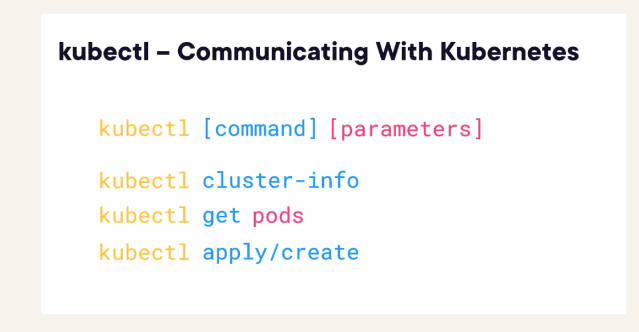
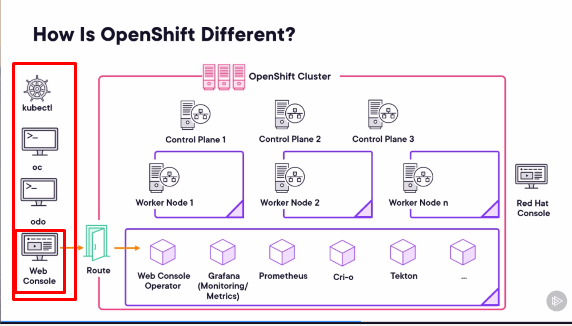
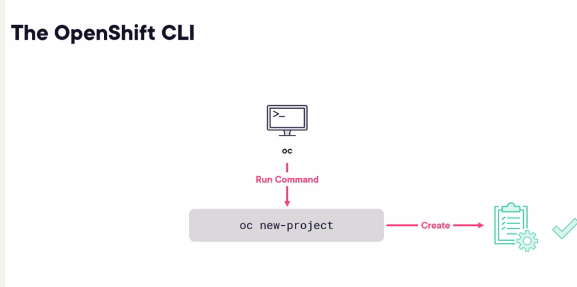
see the oc command at the start is ok
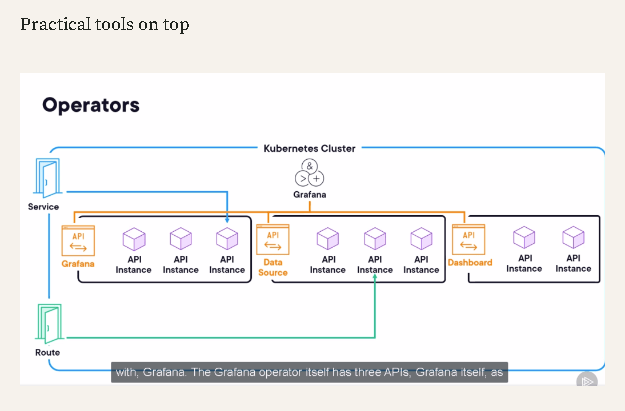
after install practical tools are coming in Grafana video would be coming in
task 1 > update the ubuntu version 18 to 22 > ( done to 24 >>> UI loading takes too much time >> we need an image )
task 2 > install the bootstrapper
-
library install > script
-
dns *
task 3> Focus on the cluster! ( other role )
Openshift resolve the account
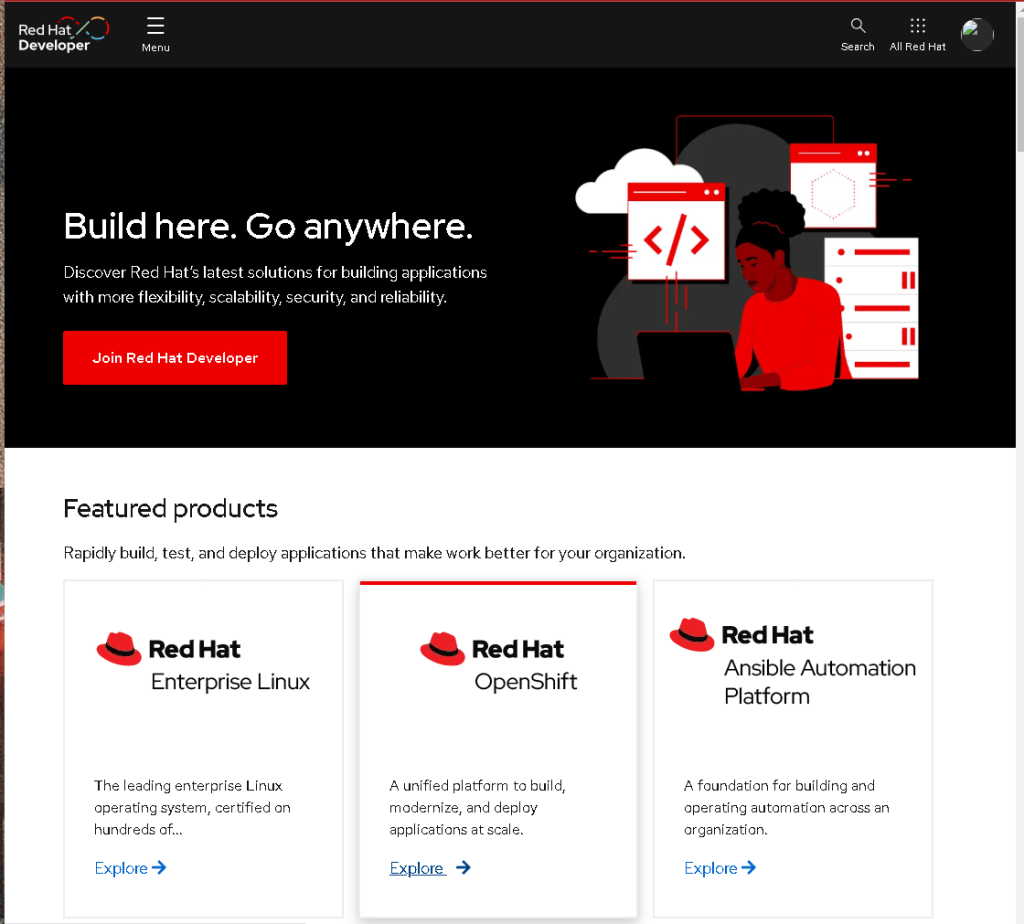
https://developers.redhat.com/?extIdCarryOver=true&sc_cid=7013a000003SgNhAAK&source=sso
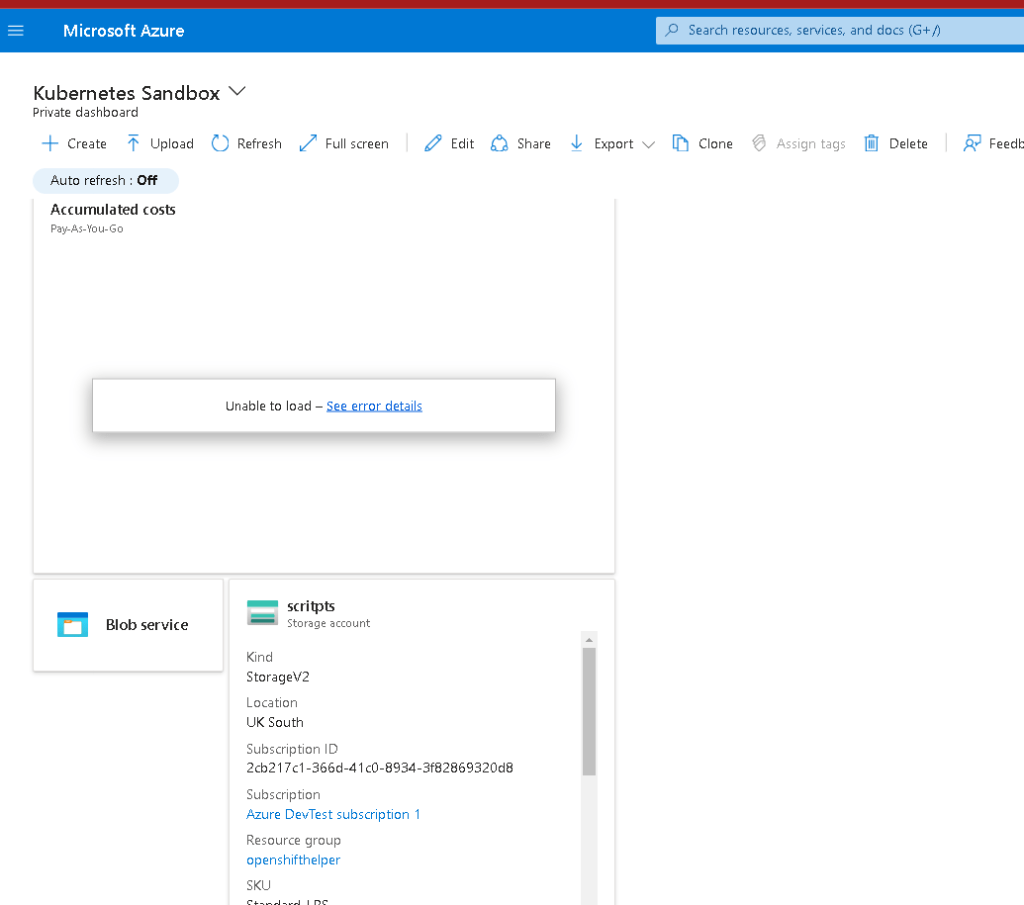
why empty ?
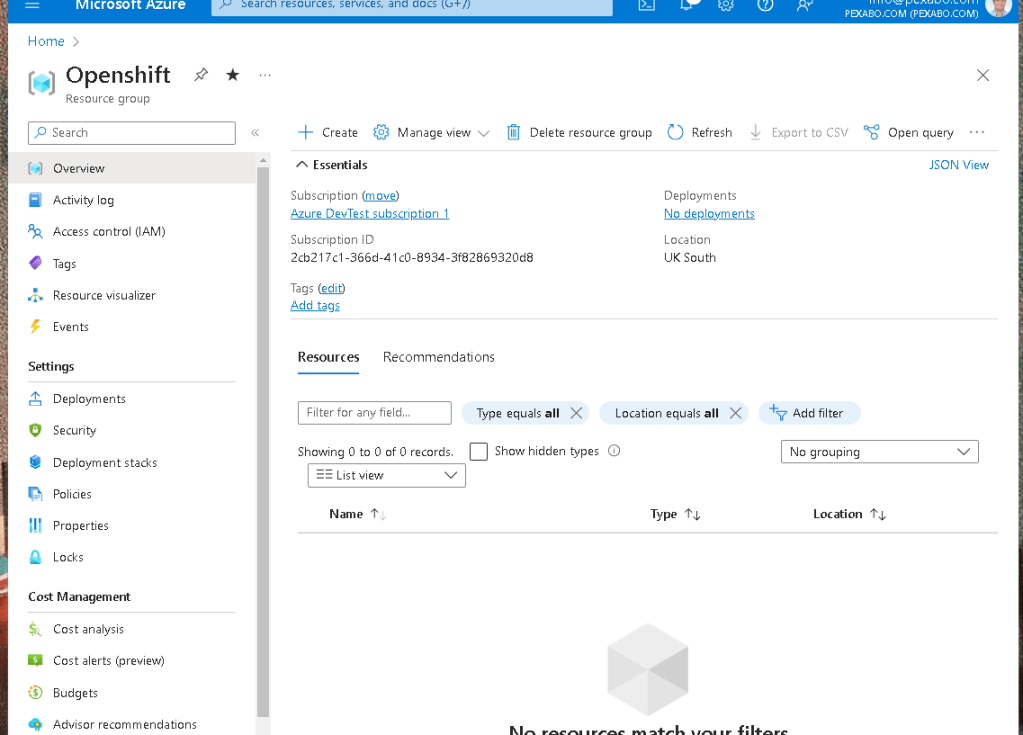
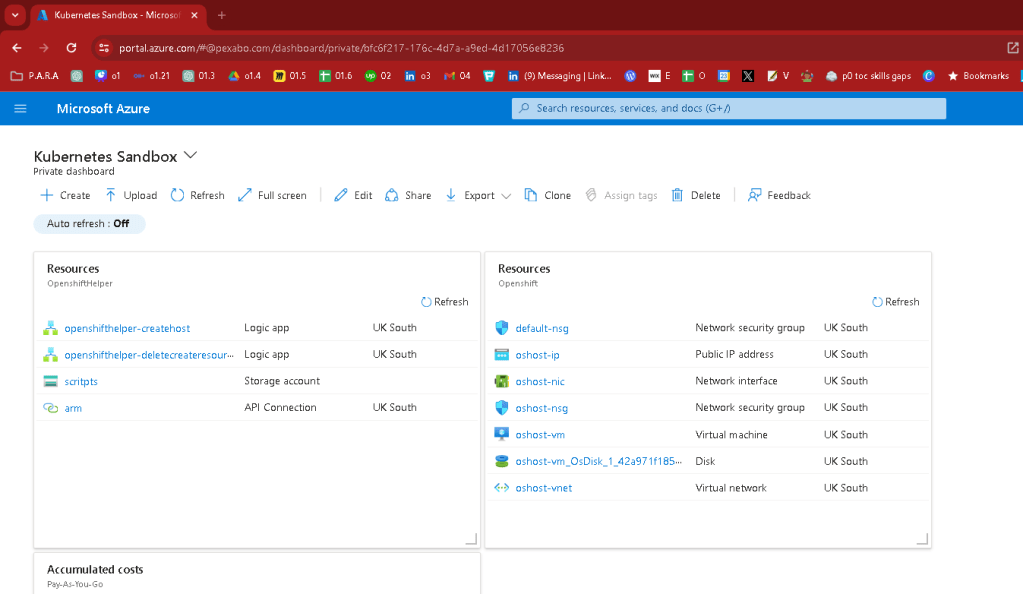
delete got triggered some how
4 day cycle
we need this to create resources with our latest image
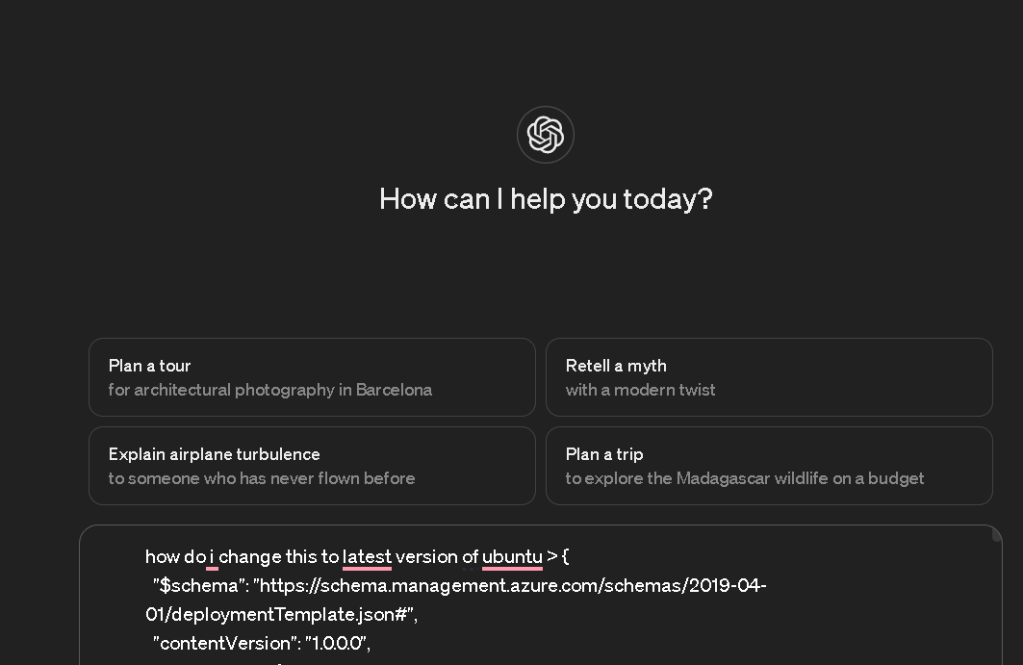
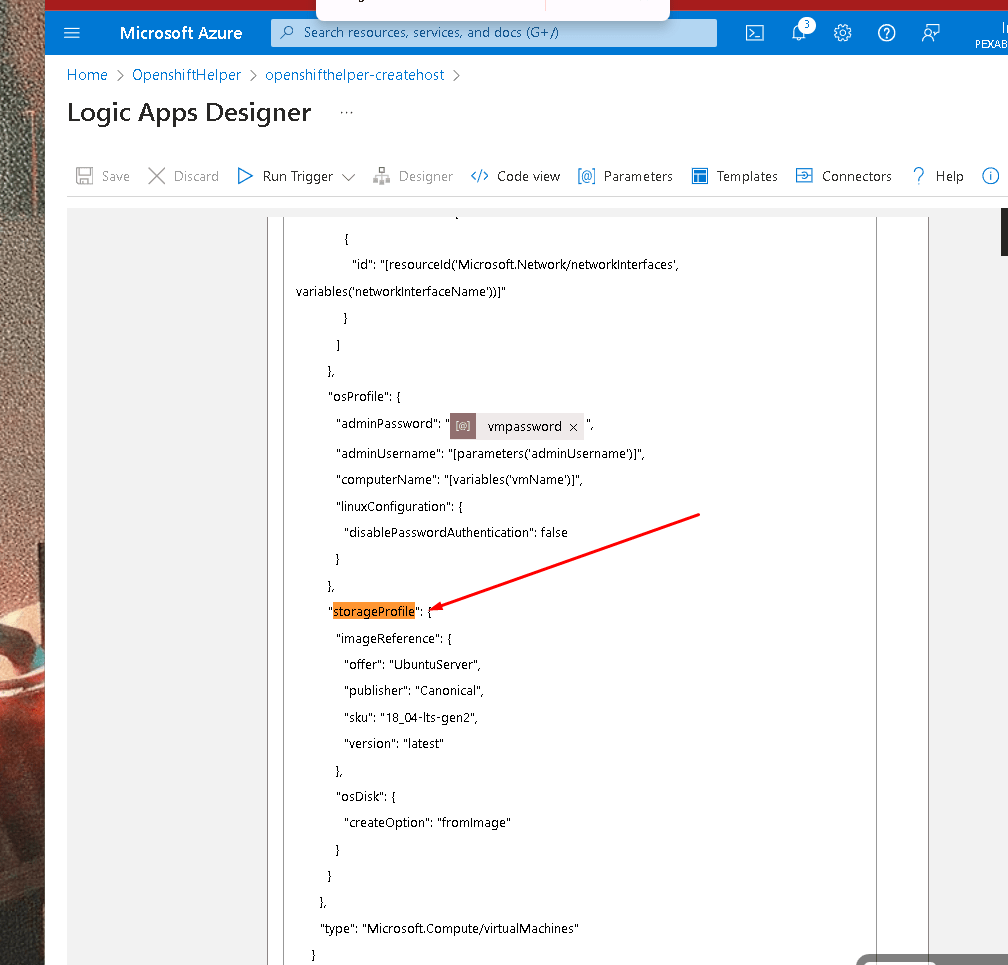
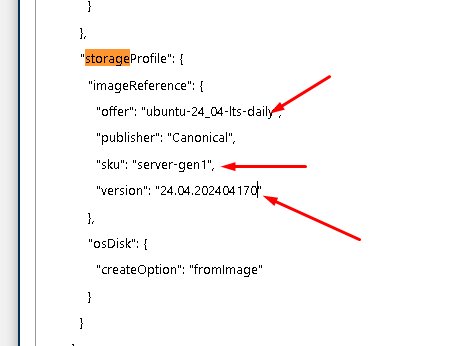
To update your Azure ARM template to deploy the latest version of Ubuntu, you need to modify the imageReference section of the storageProfile within the Microsoft.Compute/virtualMachines resource definition. This section specifies the operating system image that the virtual machine will use.
Here's what you need to change:
-
SKU: Ubuntu frequently updates its SKU names with the release of new versions. For instance, if you want to use the latest long-term support (LTS) version after Ubuntu 18.04, such as Ubuntu 20.04 LTS, you need to change the SKU to
20_04-lts-gen2. -
Publisher and Offer: Typically, for Ubuntu, the publisher is
Canonicaland the offer isUbuntuServer. These usually do not change unless Canonical changes their publishing details on Azure.
Here's an example of how the relevant part of your JSON template should look if you were updating to Ubuntu 20.04 LTS:
"storageProfile": {
"imageReference": {
"offer": "UbuntuServer",
"publisher": "Canonical",
"sku": "20_04-lts-gen2", // Change this line to the latest LTS version SKU
"version": "latest"
},
"osDisk": {
"createOption": "fromImage"
}
}
This adjustment will ensure that your deployment uses the Ubuntu 20.04 LTS image. If a newer LTS version is available and you want to use that, simply replace 20_04-lts-gen2 with the corresponding SKU of the new version, such as 22_04-lts-gen2 for Ubuntu 22.04 LTS.
Make sure to always check the Azure Marketplace or Canonical announcements for the latest available versions and their corresponding SKU names.
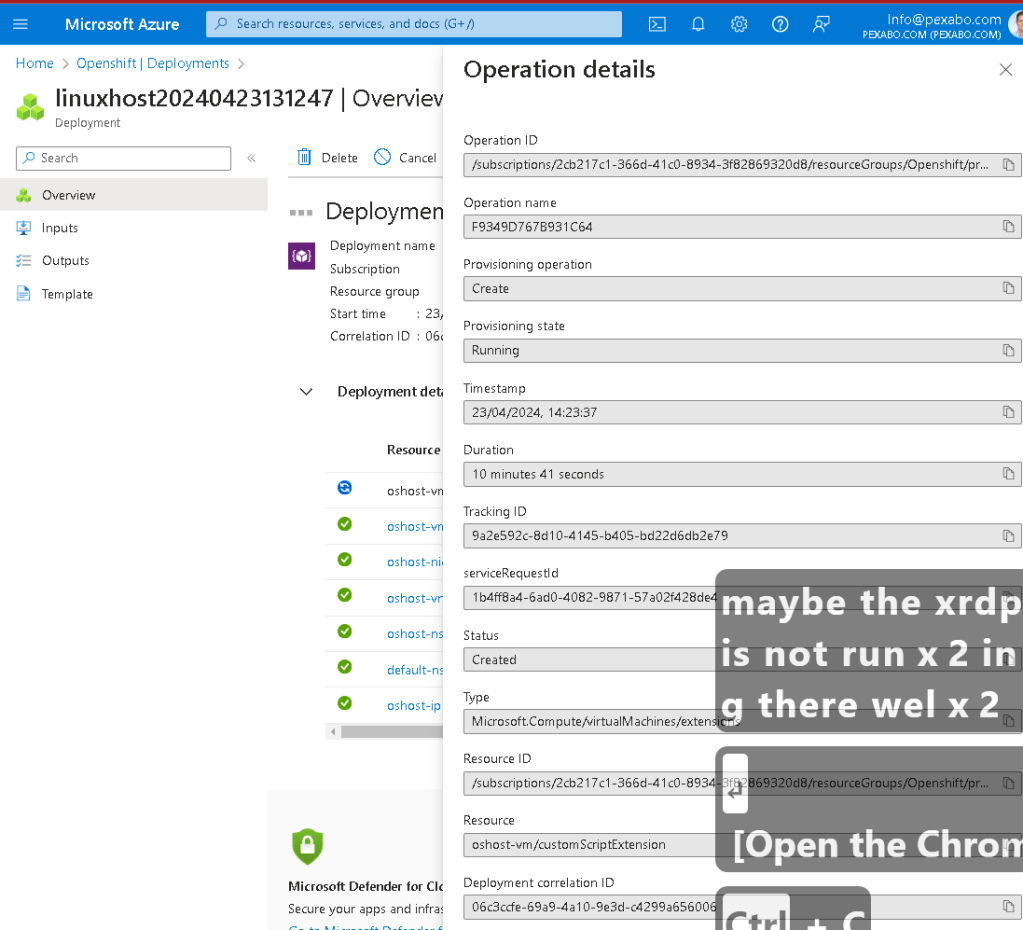
Ran 18.04
https://portal.azure.com/#view/Microsoft_Azure_EMA/LogicAppsMonitorBlade/runid/%2Fsubscriptions%2F2cb217c1-366d-41c0-8934-3f82869320d8%2FresourceGroups%2FOpenshiftHelper%2Fproviders%2FMicrosoft.Logic%2Fworkflows%2Fopenshifthelper-createhost%2Fruns%2F08584877426683168670311406728CU07
20.04 did not work
{
                  "error": {
                    "code": "InvalidTemplateDeployment",
                    "message": "The template deployment 'linuxhost20240423130012' is not valid according to the validation procedure. The tracking id is 'dca6e690-eb9b-41af-80ff-8e01f63e3a7d'. See inner errors for details.",
                    "details": [
                      {
                        "code": "InvalidParameter",
                        "target": "imageReference",
                        "message": "The following list of images referenced from the deployment template are not found: Publisher: Canonical, Offer: UbuntuServer, Sku: 20_04-lts-gen2, Version: latest. Please refer to https://docs.microsoft.com/en-us/azure/virtual-machines/windows/cli-ps-findimage for instructions on finding available images."
                      }
                    ]
                  }
                }
retirgger
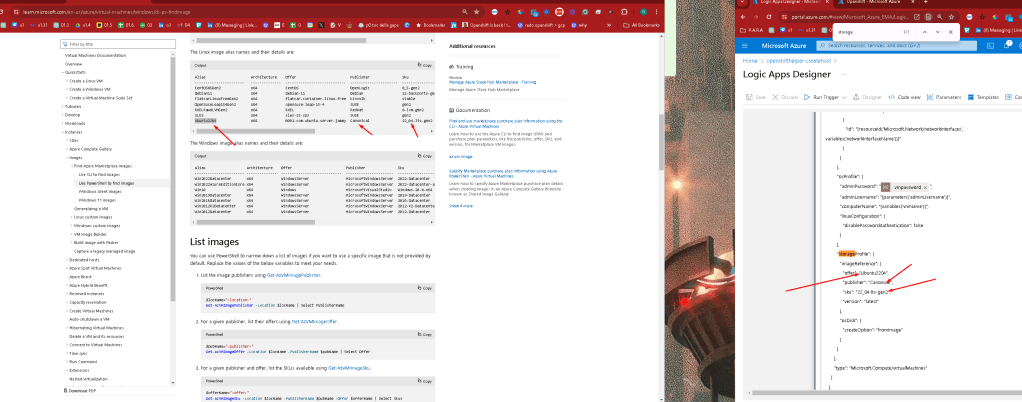
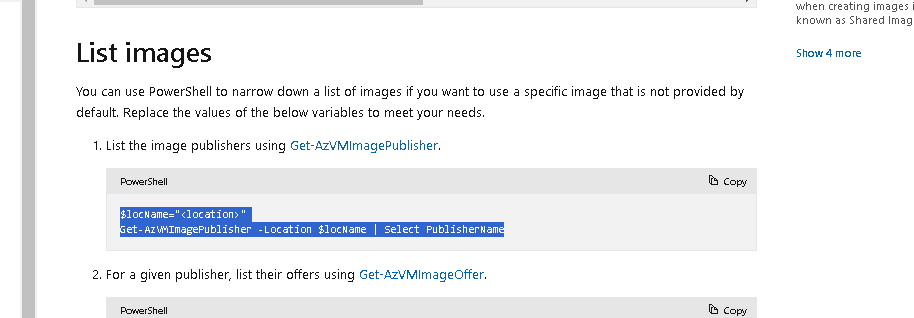
$locName="uksouth"
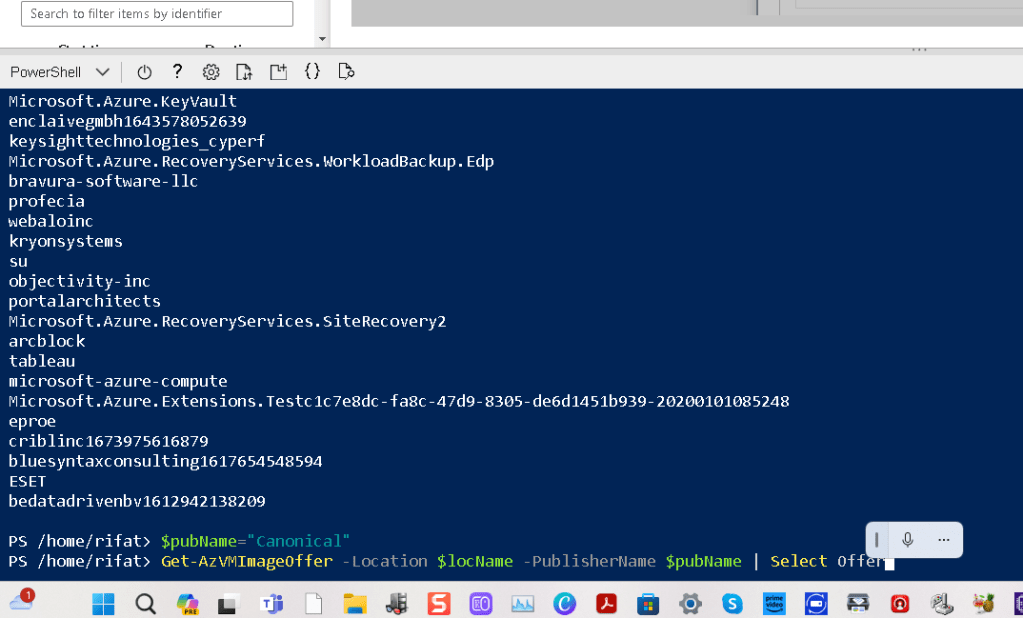
Get-AzVMImagePublisher -Location $locName | Select PublisherName
$pubName="Canonical"
Get-AzVMImageOffer -Location $locName -PublisherName $pubName | Select Offer
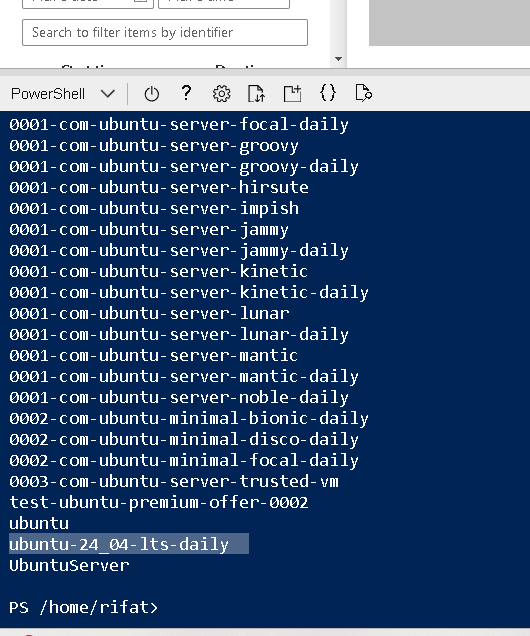
$offerName="ubuntu-24_04-lts-daily"
Get-AzVMImageSku -Location $locName -PublisherName $pubName -Offer $offerName | Select Skus
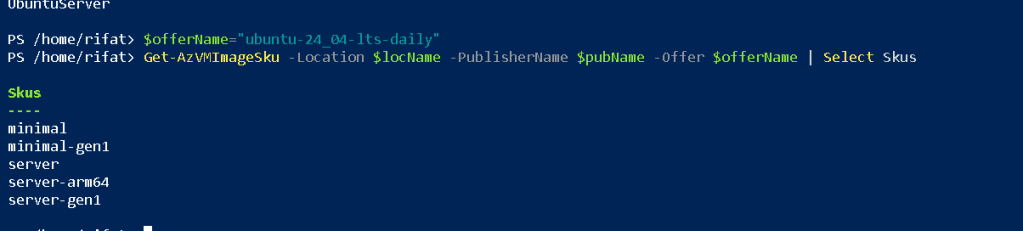
$skuName="server-gen1"
Get-AzVMImage -Location $locName -PublisherName $pubName -Offer $offerName -Sku $skuName | Select Version

lets check the xrdp there now we can do this >
the client software is what we are looking for
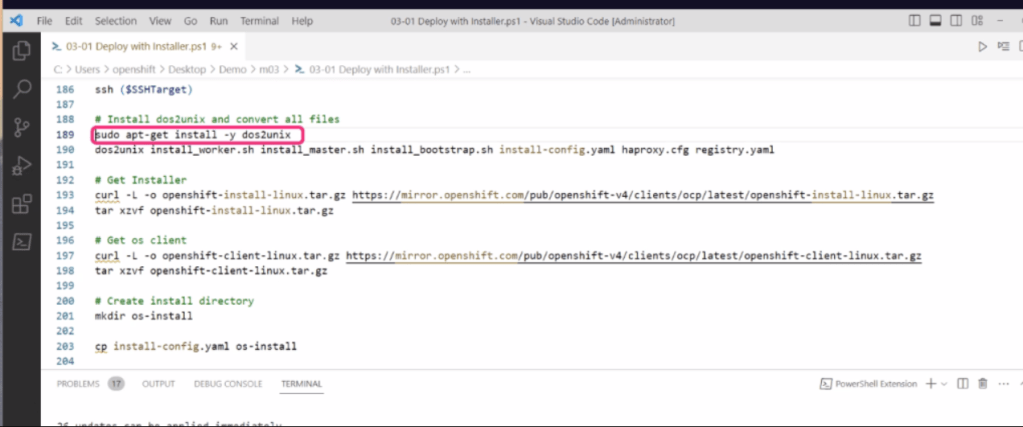
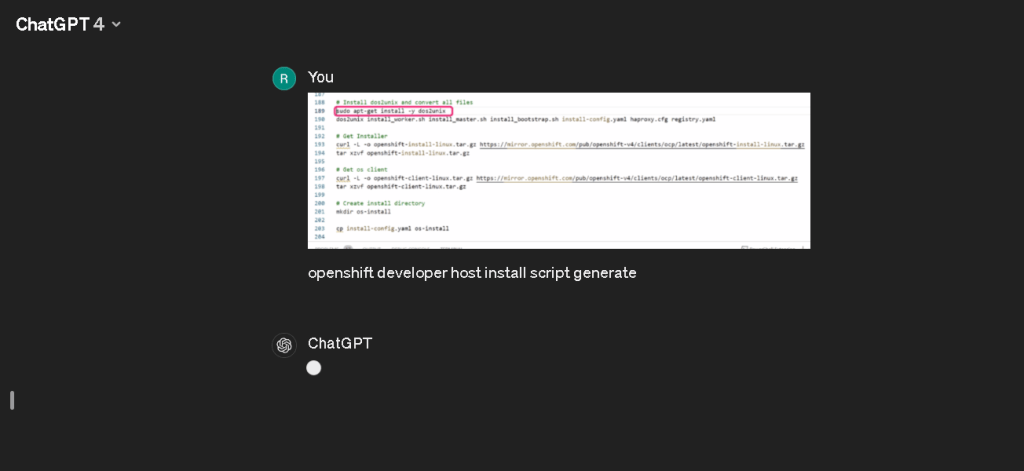
It looks like you've provided an image of a script related to installing and setting up an OpenShift environment on a developer's host. Based on this image, you may be looking to generate a similar script.
Here's an outline of the steps that might be contained in such a script, according to the commands visible in your image:
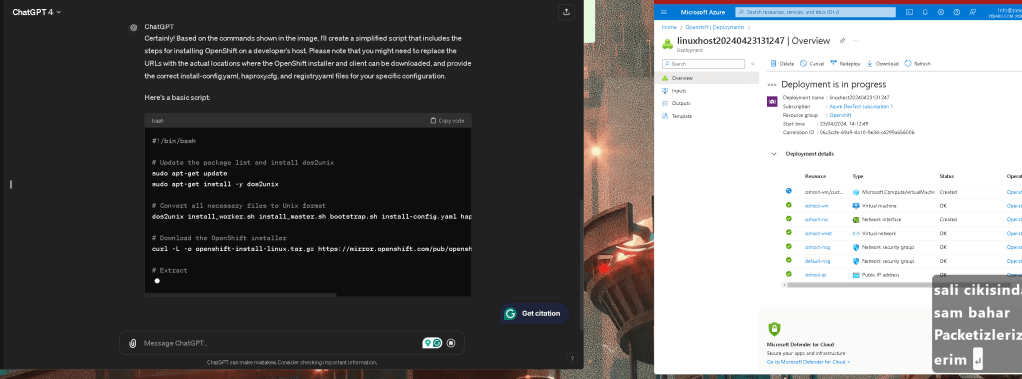
-
Install dos2unix: It's a utility to convert files from the DOS/Windows text format to the Unix text format.
-
Get Installer: Use
curlto download the OpenShift installer from the provided URL. -
Extract the Installer: Extract the downloaded tarball with
tar xvf. -
Get OC client: Download the OpenShift client (
oc) usingcurl. -
Extract the OC client: Extract the downloaded OpenShift client tarball.
-
Create Install Directory: Make a directory, typically named for organizing installation-related files.
-
Copy Configuration Files: Copy the OpenShift install configuration YAML files into the installation directory.
To recreate a full script for setting up OpenShift on a developer host, you would need to have more details, like specific URLs for downloads, which configuration files are needed, and how they should be configured.
If you can provide more details or additional parts of the script, I could help you construct a more complete version of the installation script.
than more on with xrdp to install there is they work ..this is going to be the second file in
Andres is quiet >>> time for him to come up with the numbers

maybe the xrdp is not running there well
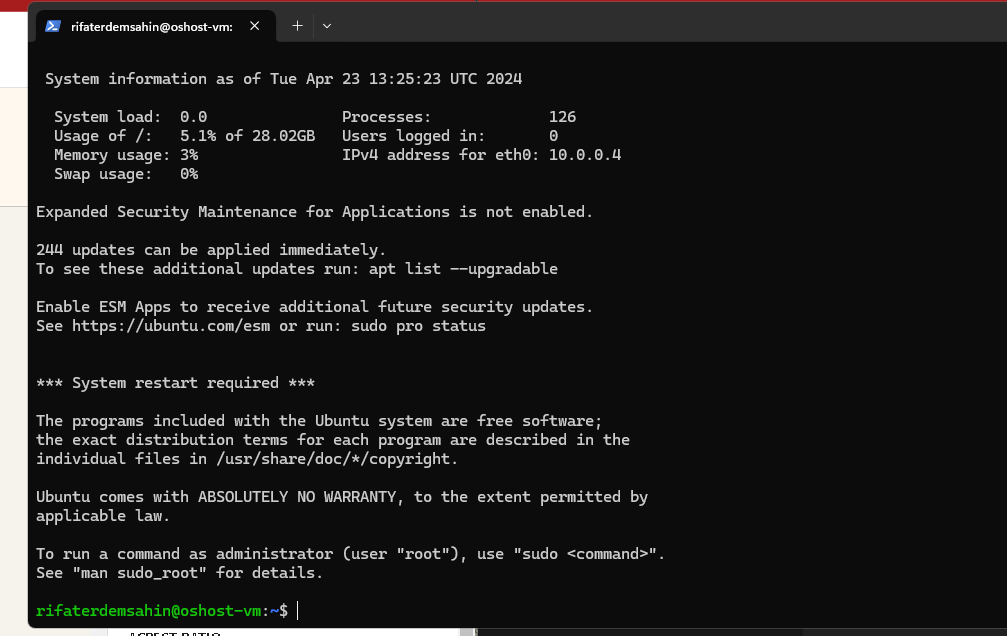
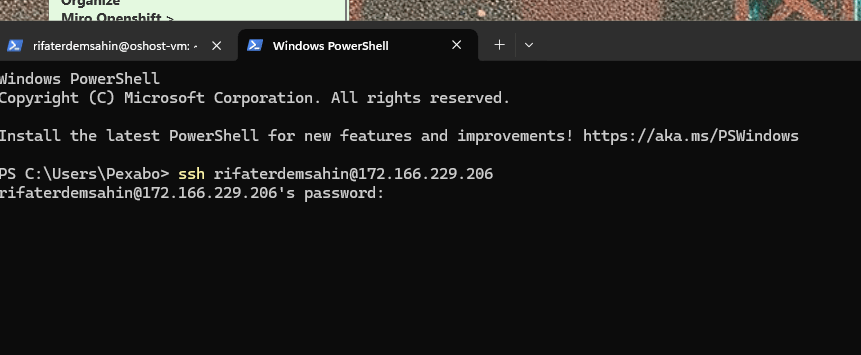
I am able to login to the box
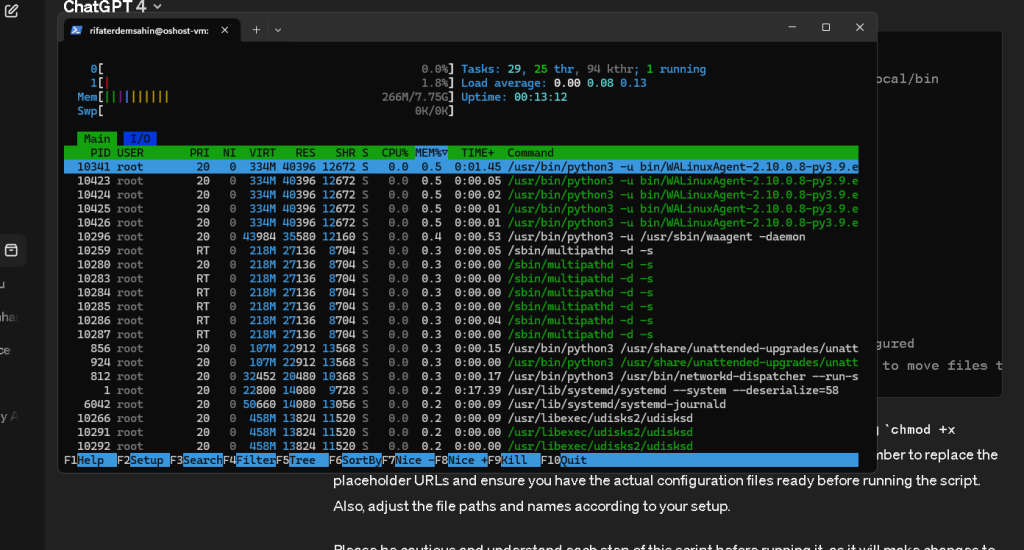
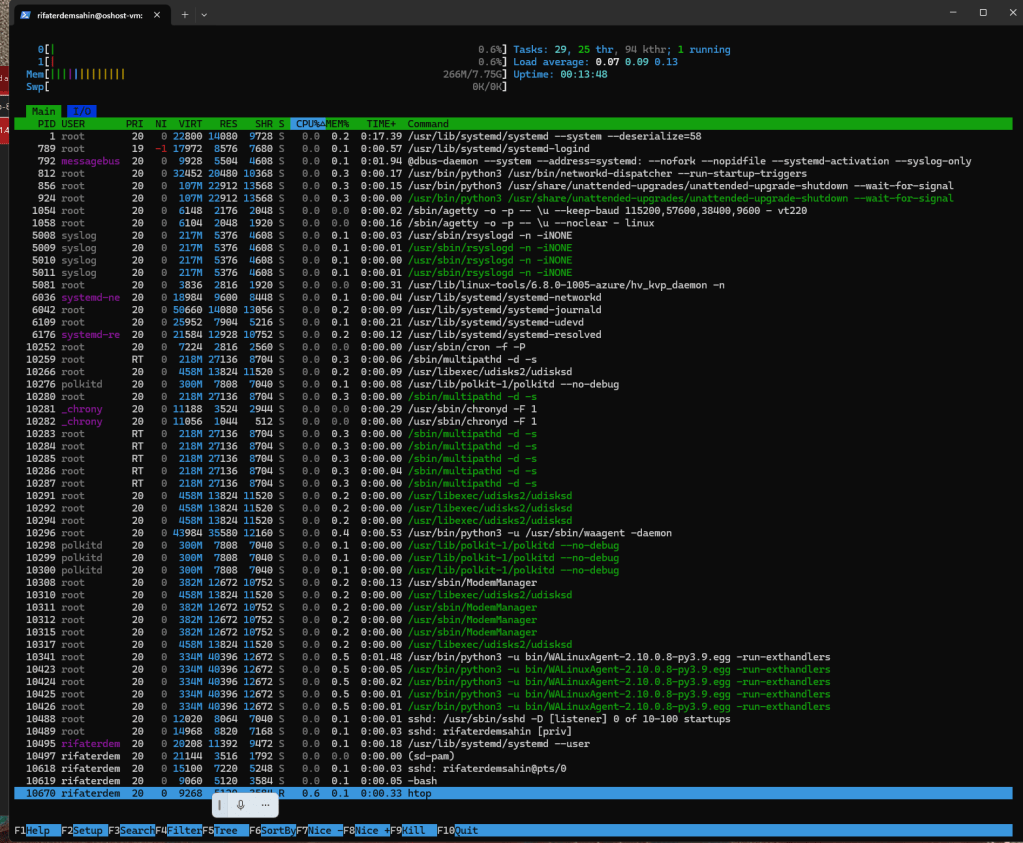
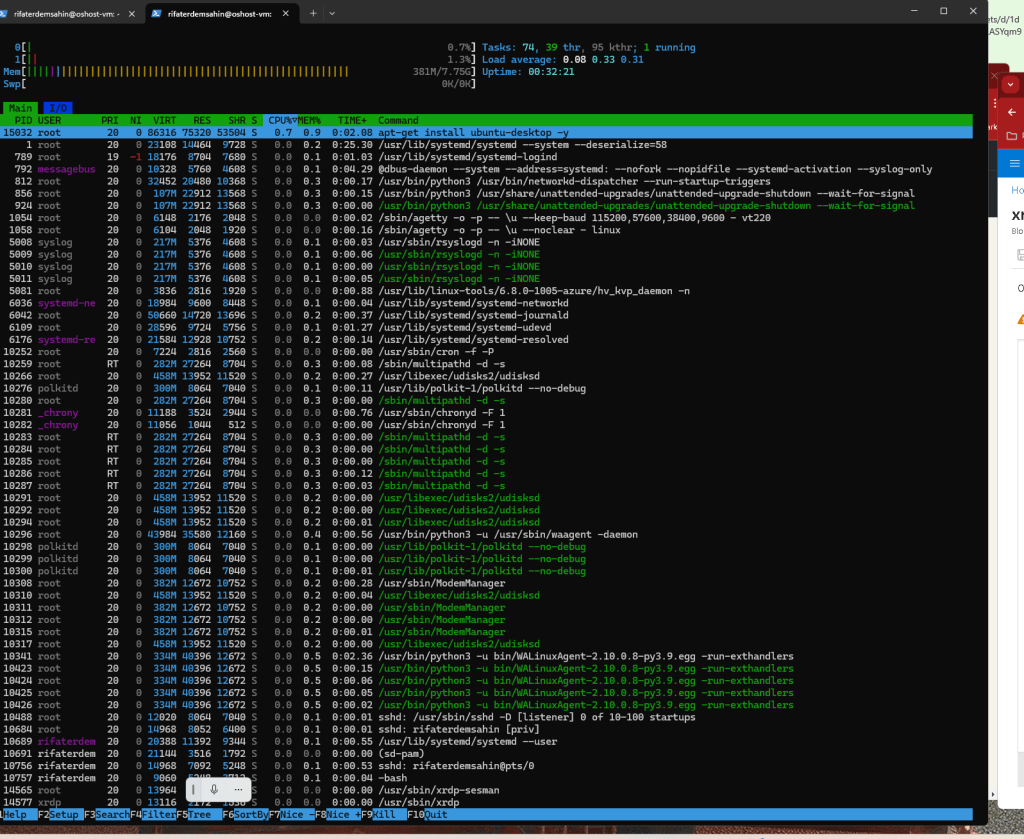
htop machine status
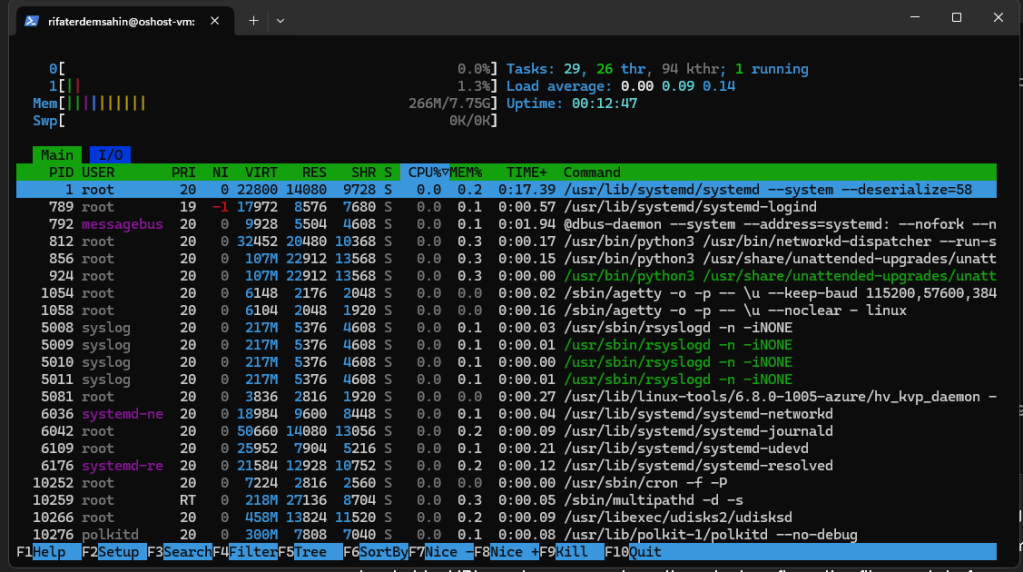
Practical sorters are there
xrdp is here
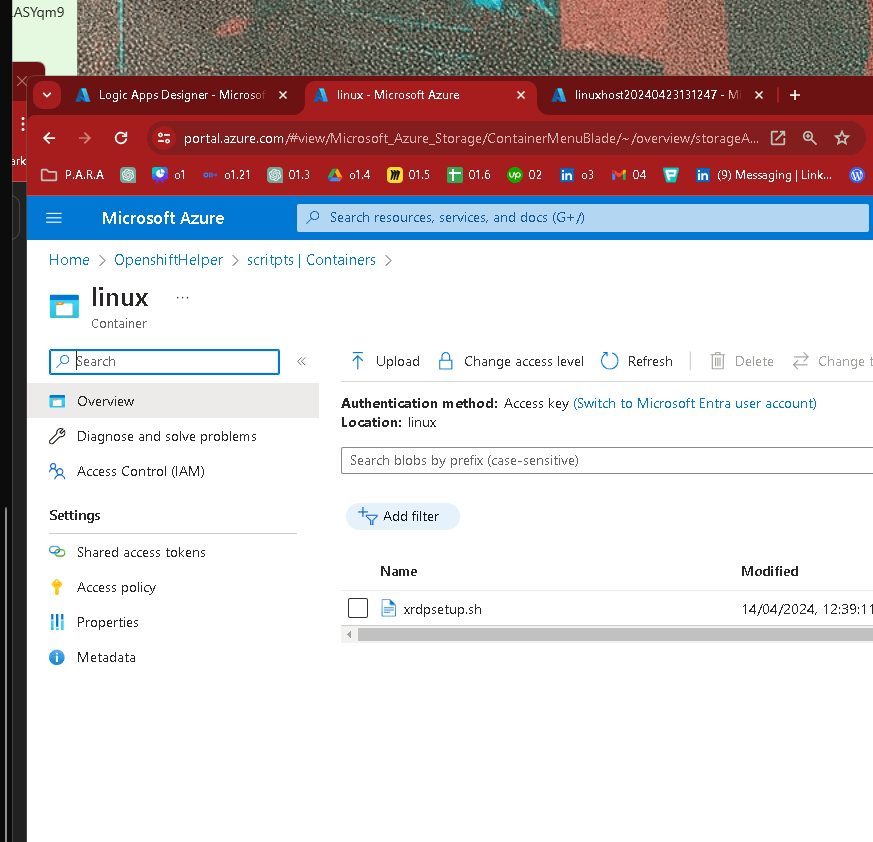
old scripts
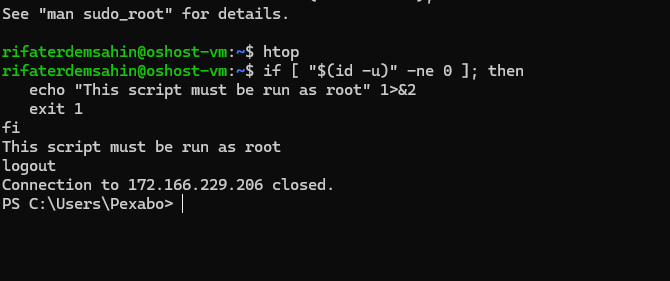
`#!/bin/bash
Ensure the script is run as root
if [ "$(id -u)" -ne 0 ]; then
echo "This script must be run as root" 1>&2
exit 1
fi
Update the package list and upgrade all installed packages
apt-get update -y
if [ $? -ne 0 ]; then
echo "Failed to update package list" 1>&2
exit 1
fi
apt-get upgrade -y
if [ $? -ne 0 ]; then
echo "Failed to upgrade installed packages" 1>&2
exit 1
fi
Install xrdp and configure it
apt-get install xrdp -y
if [ $? -ne 0 ]; then
echo "Failed to install xrdp" 1>&2
exit 1
fi
ufw allow 3389/tcp
echo "gnome-session" > /etc/skel/.xsession
# Using /etc/skel so new users inherit this setup
Install Ubuntu desktop environment correctly
apt-get install ubuntu-desktop -y
if [ $? -ne 0 ]; then
echo "Failed to install ubuntu-desktop" 1>&2
exit 1
fi
systemctl restart xrdp
if [ $? -ne 0 ]; then
echo "Failed to restart xrdp" 1>&2
exit 1
fi
Log the reboot action
echo "$(date "+%Y-%m-%d %H:%M:%S") - System is rebooting" >> /var/log/reboot.log
Reboot the system silently
nohup shutdown -r now > /dev/null 2>&1 &
`
maybe it is out at starts?

To add a user to the sudo group on a Linux system, which essentially gives them superuser privileges, you would typically use the following command:
-
Open your terminal.
-
Type the following command to add the user "rifaterdemsahin" to the sudo group:
sudo usermod -aG sudo rifaterdemsahin
Here's what each part of the command does:
-
sudo: Runs the command as a superuser. -
usermod: A utility to modify a user account. -
-aG: The-ais to append the user to the given group, and-Gspecifies the group. -
sudo: The name of the group to which the user will be added. -
rifaterdemsahin: The username of the user you want to add to the sudo group.
Make sure that you have administrative privileges to execute this command. After running it, the user "rifaterdemsahin" will have sudo access and can execute commands that require superuser permissions.

only sudo works maybde 24 is different
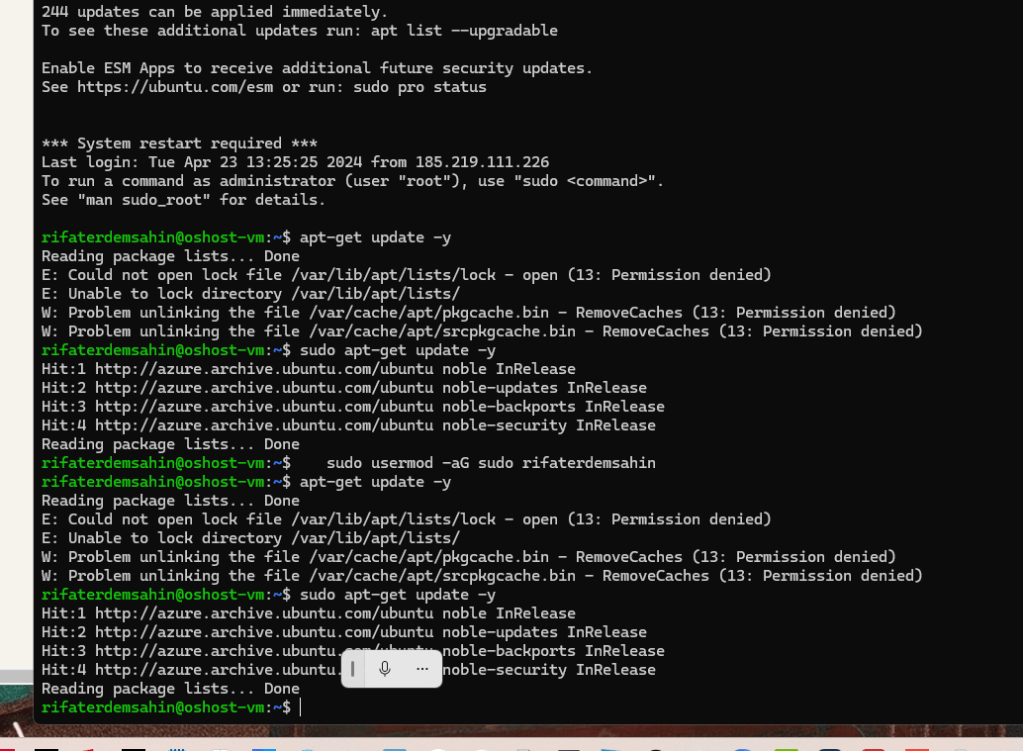
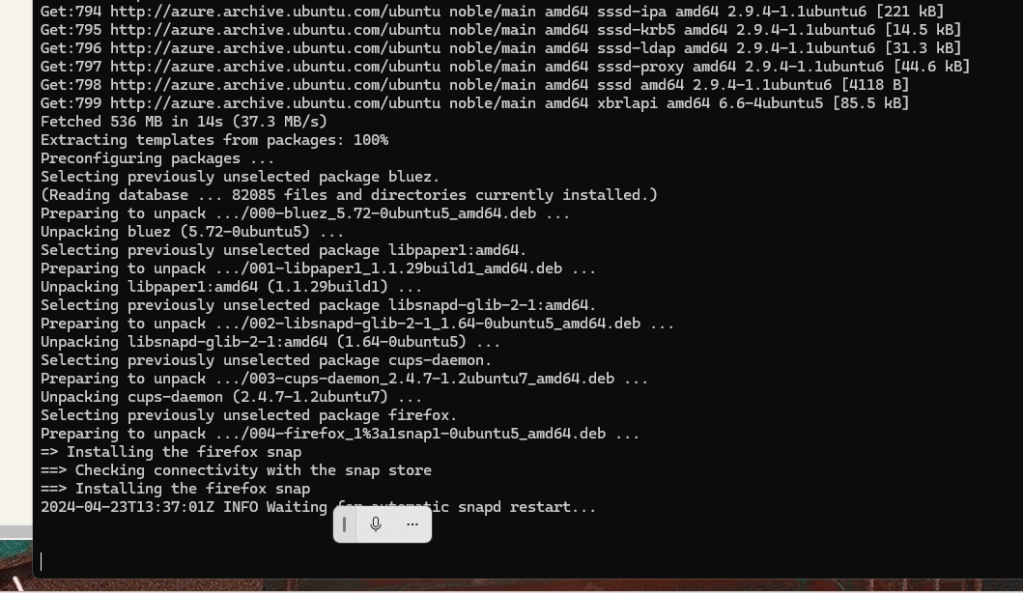
it says the packages are there
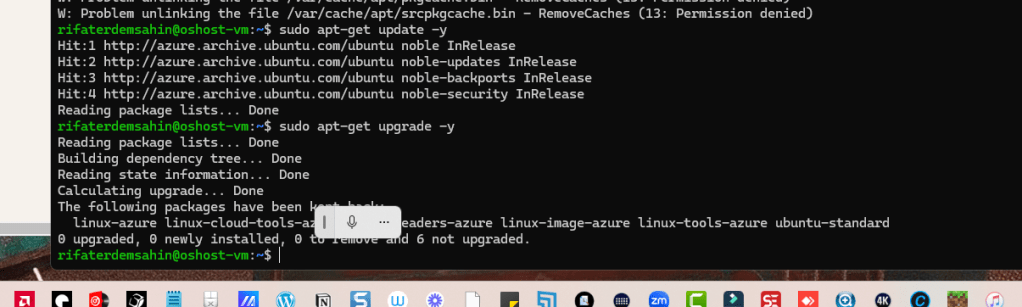
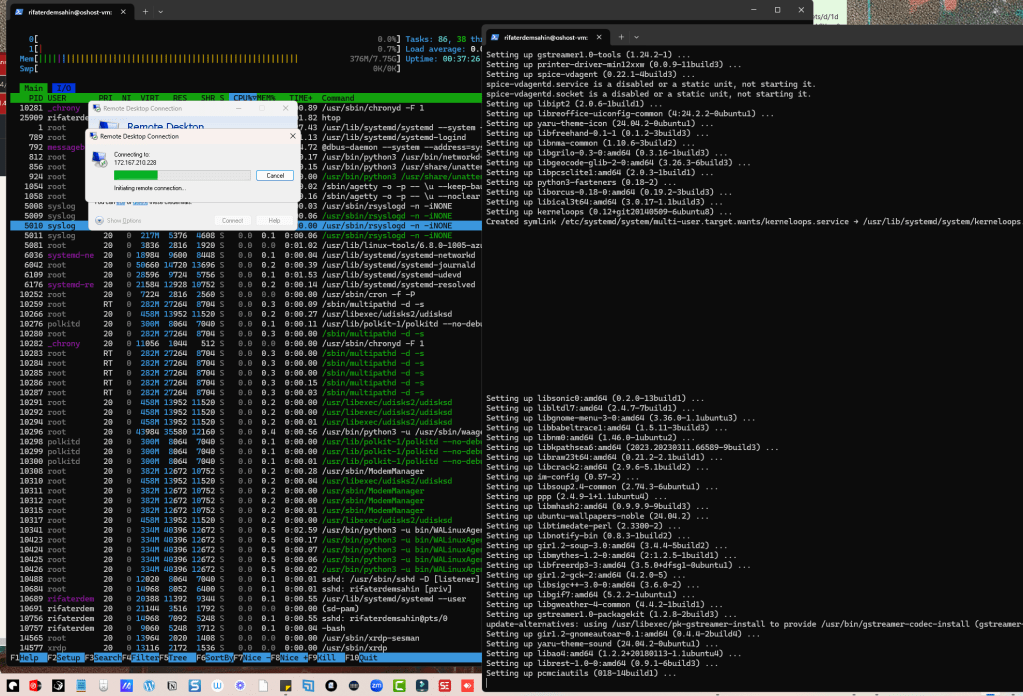
Looks like this part is working now > apt-get install xrdp -y
up it could be stuck
this looks like it is working
azure one looks like it is stuck
UI brings much more components than the past
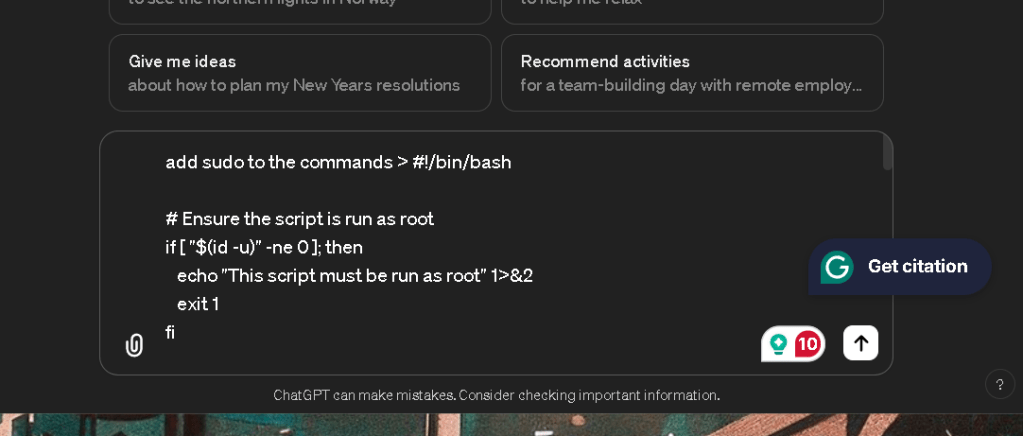

!/bin/bash
Ensure the script is run as root
if [ "$(id -u)" -ne 0 ]; then
echo "This script must be run as root" 1>&2
exit 1
fi
Update the package list and upgrade all installed packages
sudo apt-get update -y
if [ $? -ne 0 ]; then
echo "Failed to update package list" 1>&2
exit 1
fi
sudo apt-get upgrade -y
if [ $? -ne 0 ]; then
echo "Failed to upgrade installed packages" 1>&2
exit 1
fi
Install xrdp and configure it
sudo apt-get install xrdp -y
if [ $? -ne 0 ]; then
echo "Failed to install xrdp" 1>&2
exit 1
fi
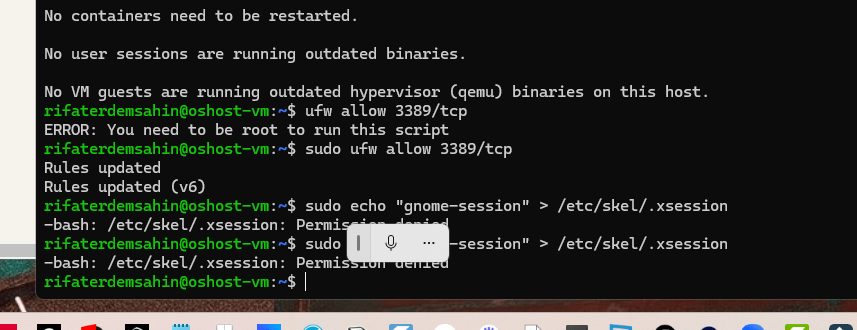
sudo ufw allow 3389/tcp
echo "gnome-session" | sudo tee /etc/skel/.xsession > /dev/null # Using /etc/skel so new users inherit this setup
Install Ubuntu desktop environment correctly
sudo apt-get install ubuntu-desktop -y
if [ $? -ne 0 ]; then
echo "Failed to install ubuntu-desktop" 1>&2
exit 1
fi
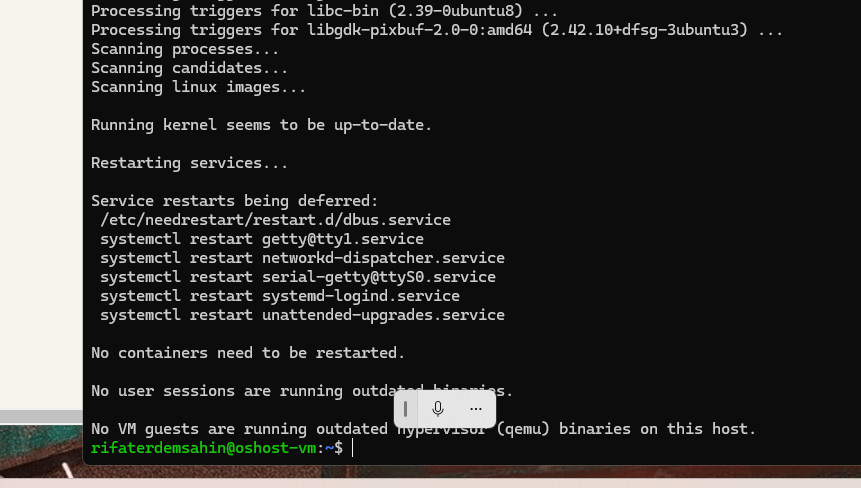
sudo systemctl restart xrdp
if [ $? -ne 0 ]; then
echo "Failed to restart xrdp" 1>&2
exit 1
fi
Log the reboot action
echo "$(date "+%Y-%m-%d %H:%M:%S") - System is rebooting" | sudo tee -a /var/log/reboot.log > /dev/null
Reboot the system silently
sudo nohup shutdown -r now > /dev/null 2>&1 &
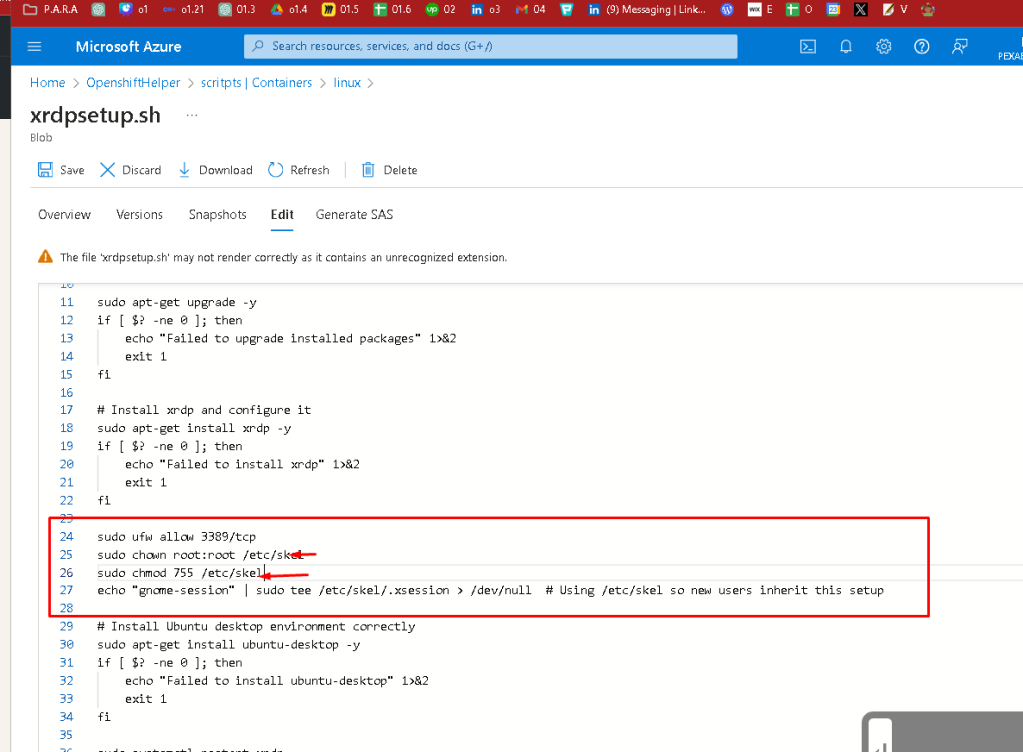
If you're experiencing a failure with the command echo "gnome-session" | sudo tee /etc/skel/.xsession > /dev/null on Ubuntu 24.04 due to permission issues, there are a few things to check and ensure for it to execute successfully:
-
Sudo Privileges: Ensure the user executing the script has the necessary sudo privileges. This typically means the user should be able to execute commands with
sudowithout entering a password, or you must run the script in a context where the password can be entered if prompted. -
Filesystem Permissions: Make sure that the
/etc/skeldirectory has the correct permissions. You can check the permissions with the following command:
ls -ld /etc/skel
Typically, the directory should be owned by root, and writable by the owner. If the permissions are incorrect, you can set them with:
sudo chown root:root /etc/skel
sudo chmod 755 /etc/skel
- Sudo Configuration: If the user has sudo access but cannot execute this specific command, check the sudoers file for any command-specific restrictions. You can view the sudoers file by running:
sudo visudo
Look for any lines that might limit the commands your user can run. Ensure there are no restrictive settings for the specific command or that the user isn’t limited to a subset of commands.
- SELinux or AppArmor Policies: Ubuntu uses AppArmor as a security module that could restrict actions even under sudo. If AppArmor is enforcing a policy that prevents writing to
/etc/skel/.xsession, you might need to adjust the policy. Check the status and logs of AppArmor with:
sudo aa-status
sudo dmesg | grep apparmor
Adjusting AppArmor policies can be complex, so it's essential to understand the implications of changes you make.
- Debugging the Command: Run the command outside the script to check its output and error messages directly in your terminal. This might provide additional clues:
echo "gnome-session" | sudo tee /etc/skel/.xsession
By ensuring these aspects are correctly set up, the command should execute without permission issues. If problems persist after checking and adjusting these settings, you may need to look deeper into system logs or specific configurations unique to your setup.
feels stuck
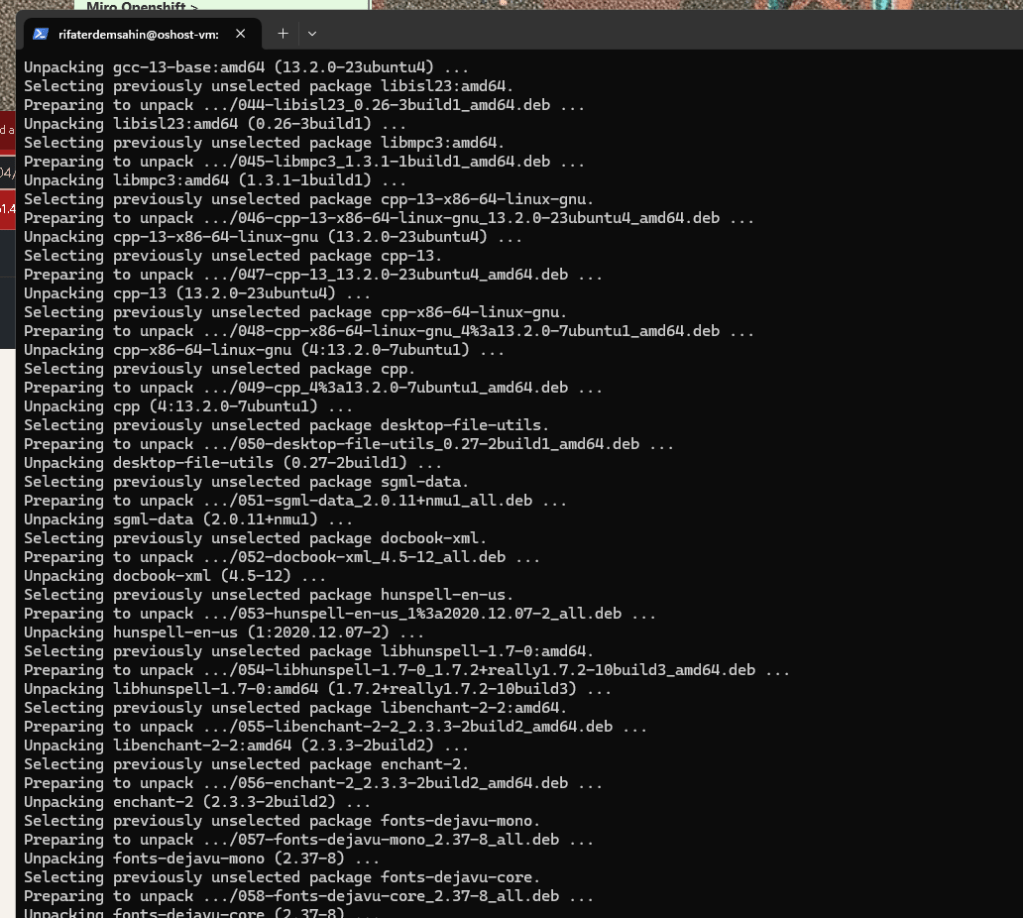
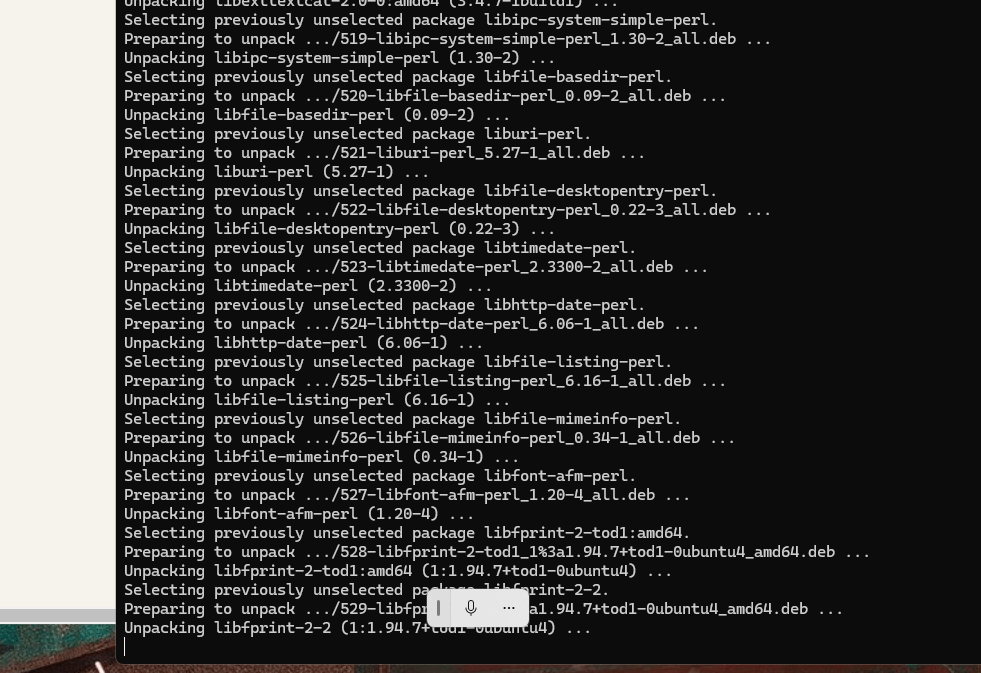
much longer install time is there
Script pinned as well
Imported from rifaterdemsahin.com · 2024